The New Page Wizard will guide you through the creation of a new page in just a few simple steps.
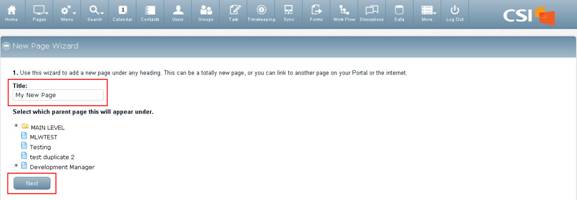
1. First, enter a Title for the page in the blank text box under Title.
2. Select the parent page you want your new page to appear under, and click the Next button.
3. Make sure the title on this page matches the one you chose on the previous page.
4. Choose the type of page this will be by clicking the appropriate radio button, and then click Next.
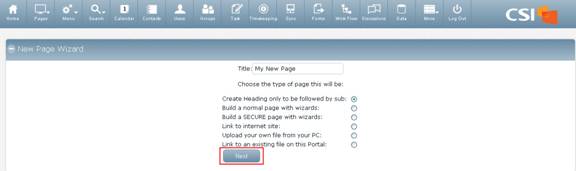
· Create Heading only to be followed by sub: The heading does not link to anything; it is simply a heading that houses sub headings. (Example: “Departments” main heading, followed by “Accounting” sub heading, “Administration” sub heading, etc.)
· Build a normal page with wizards: This launches a Wizard to take you through the page building process.
If this selection is chosen, a template must be selected to manage the layout of the page. The layout chosen at initial creation of a page can be changed using the Edit Page option at a later time.
· Build a SECURE page with wizards: This launches a Wizard to take you through the secure page building process.
If this selection is chosen, a template must be selected to manage the layout of the page. The layout chosen at initial creation of a page can be changed using the Edit Page option at a later time. See template explanation below for more information regarding templates.
– Default Templates: These default templates give you a variety of page layout options.
Arrange your information in 1 or 2 rows with 1, 2 or 3 column configurations. There is also a Book Layout, a Document Storage Layout and an Outline Layout. Document Storage Templates automatically store and sort files in date order and group them appropriately for display; this is great for storing meeting minutes and daily, weekly or monthly reports.
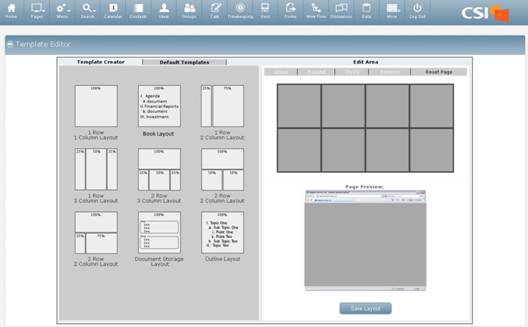
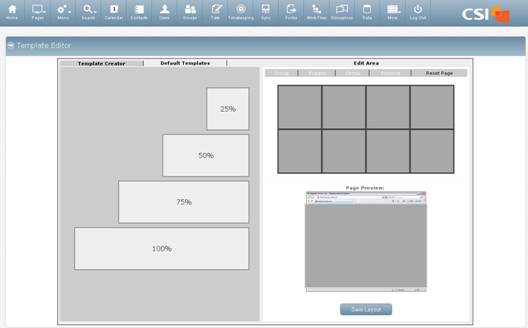
– Template Creator: This is where you can create your own template to fit your unique page’s needs. Resize, shrink, expand and/or drag boxes to design your desired layout. Make any changes, moves, etc. and click the Save Layout button when you’re finished editing.
· Link to Internet site: Choose this option to link the page to a specific URL. When users click on the heading for this page, they will be taken to that Internet site.
Enter the internet address in the Internet URL box and click Next.

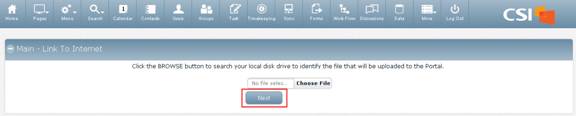
· Upload your own file from your PC: Pick this option to link to a file that is stored on your PC or server.
Click the Choose File button to find the file. Then select Next.
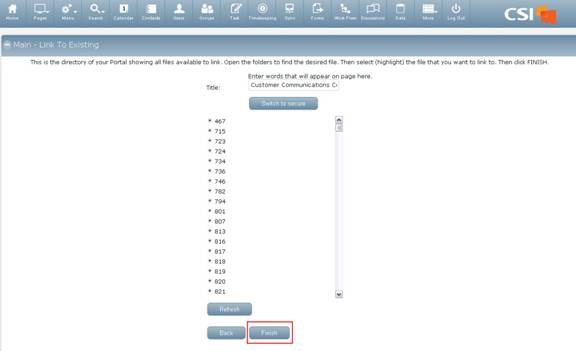
· Link to an existing file on this Portal: Select this option to link to a file that is already posted on CSI Secure Connect. This will launch the directory of your Portal, showing all files available to link.
Open the folders to find the file you want, and then highlight the file. Once you have the desired file highlighted, click the Finish button.