 Customer Portal
Send Feedback
Print
Customer Portal
Send Feedback
Print
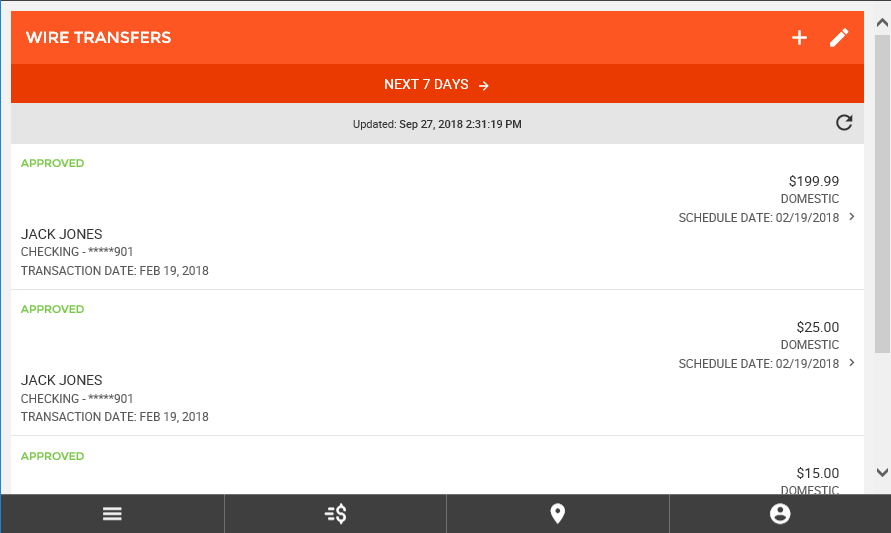
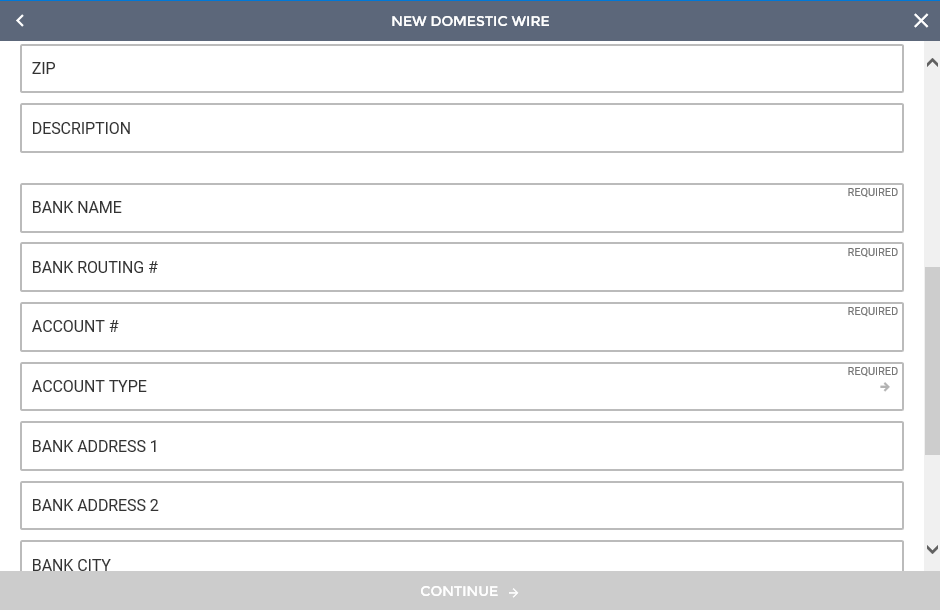
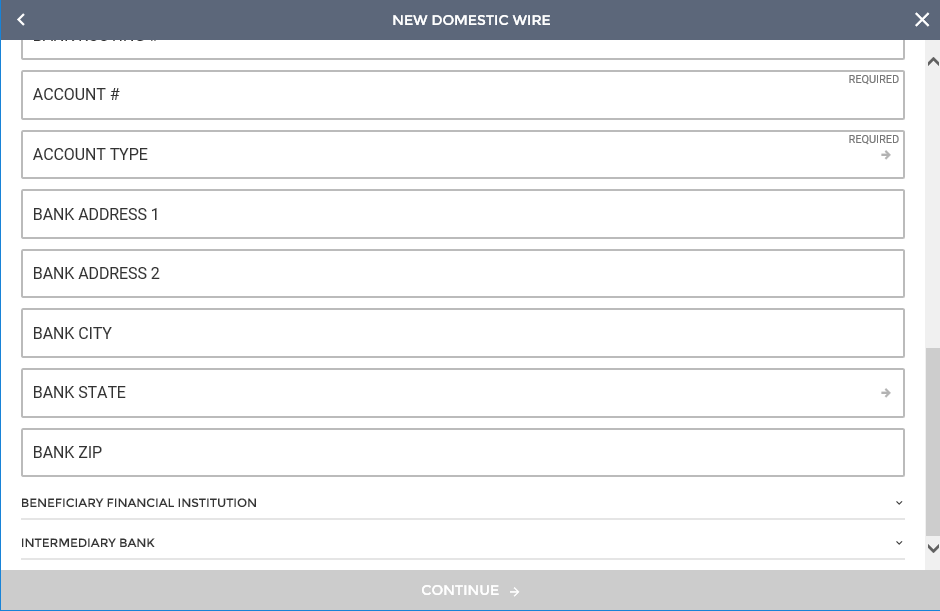
Domestic Wire SetupThe first step in creating a new wire is entering the necessary header and recipient information including;
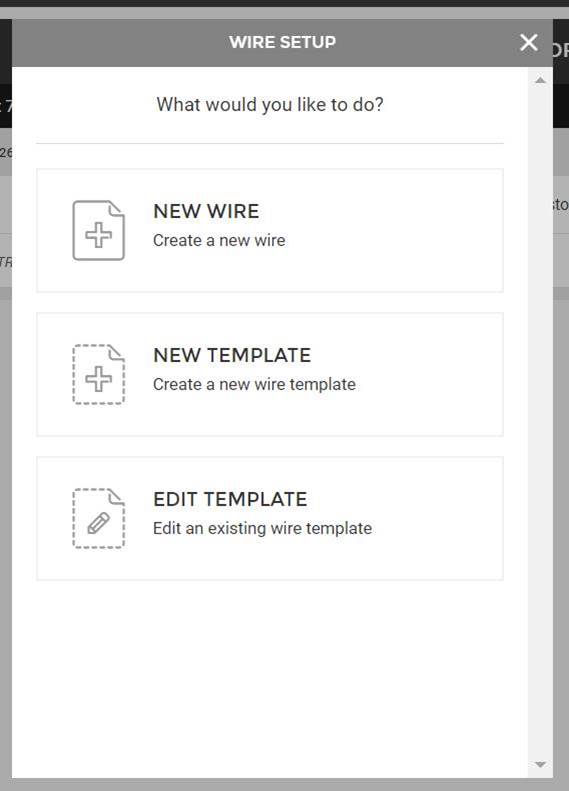
Clicking on the (+) button on Wire Transfer page will enter Wire Setup. Here you can create a new wire, create new template or edit a wire template.
To create a new wire click + button near the top of the page. This will enable the wire wizard in which you will elect new wire
Once all required fields have been filled out, you can click "Continue" at the bottom of the screen to proceed to the next step. Other fields are displayed and values can be provided but they are not required.
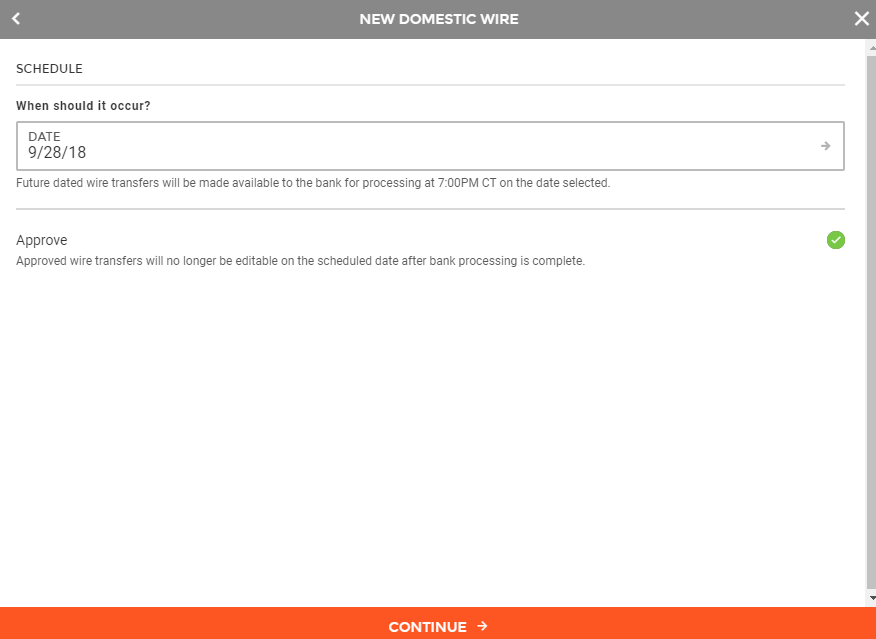
The next step is to schedule the wire. On this screen, you can select the date you wish for the wire transfer to occur and whether you want to approve the wire at this time.
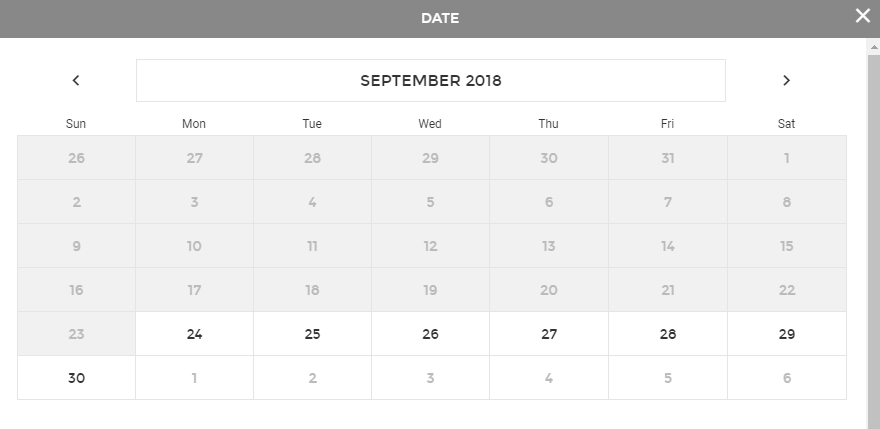
Clicking within the date field will bring up a calendar that can be used to select the effective date.
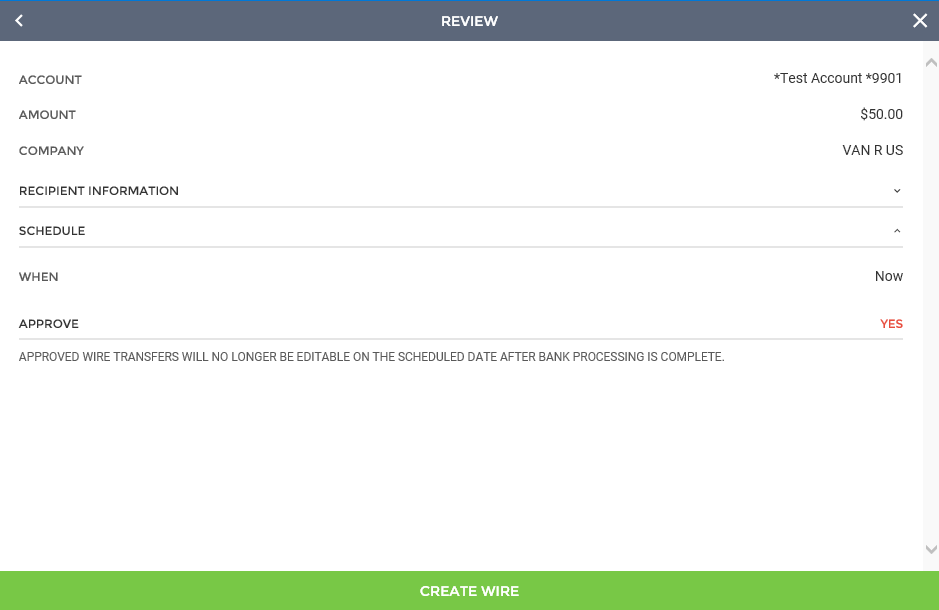
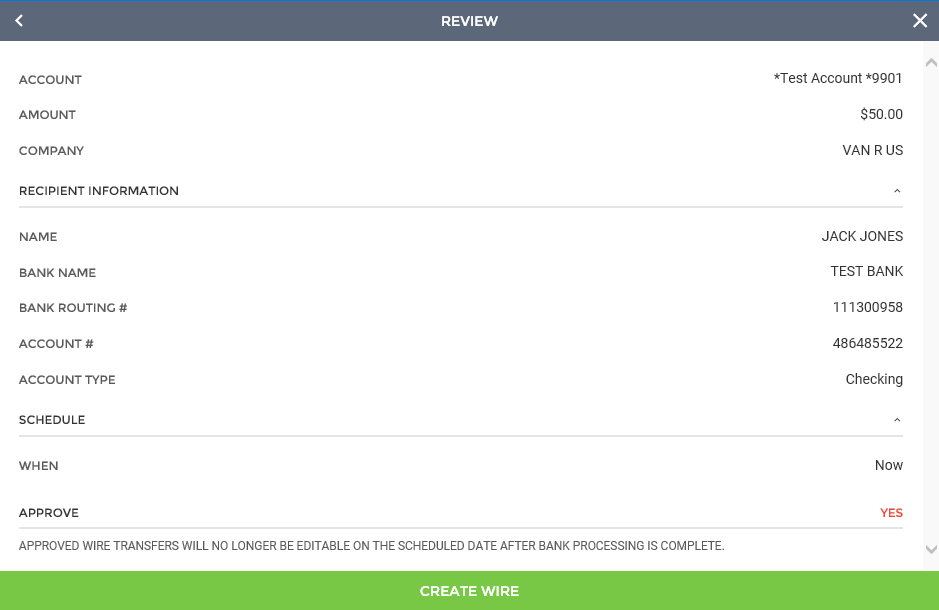
When finished, you can click the "Continue" button at the bottom of the screen to review the wire transfer prior to submission. On the review screen, you will be able to see all details for the wire. This includes:
If all information contained within the review screen looks accurate, you can select to "Create Wire" to complete the wire creation process.
Recipient Information section expanded:
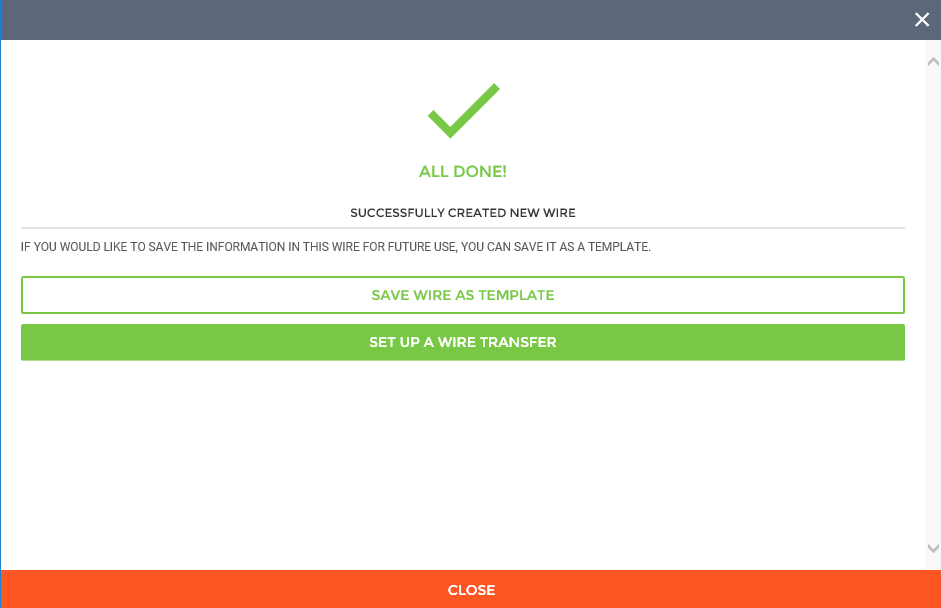
Upon finishing the process, you will see a success message, letting you know that the wire was created properly. From this screen, you can save the wire as a template, set up a new wire transfer, or close the window to exit the wizard.
65825
| ||||

| Top of Page |
Customer Portal
Send Feedback
Print |
||
|
|||