 Customer Portal
Send Feedback
Print
Customer Portal
Send Feedback
Print
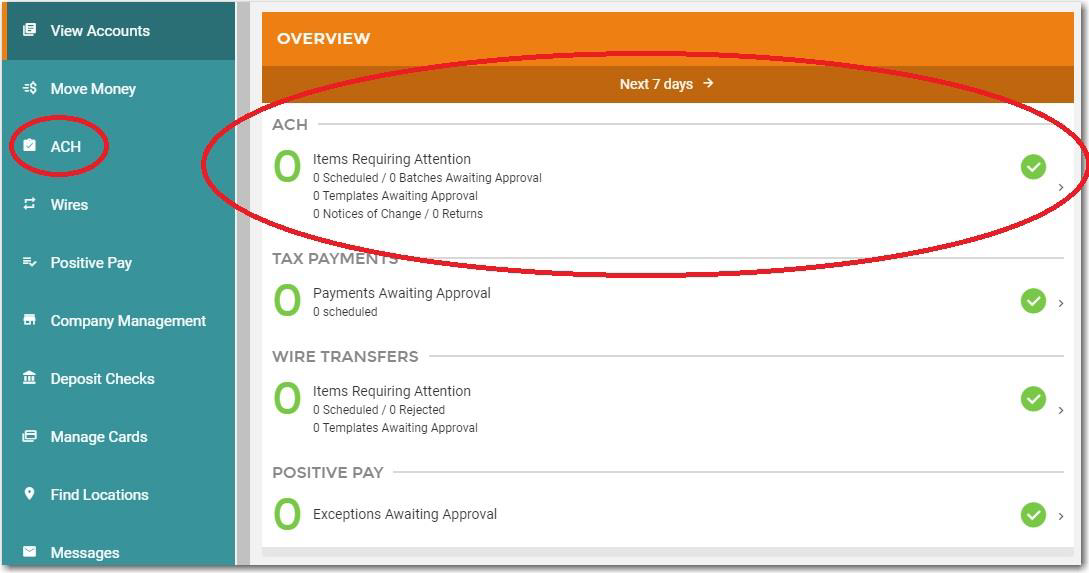
Creating an ACH Batch Using Templates1. Navigate to ACH Screen To begin creating a new ACH batch, you can either select the ACH menu item within the menu on the left side of the screen, or select the Overview >> ACH Batches section on the landing page.
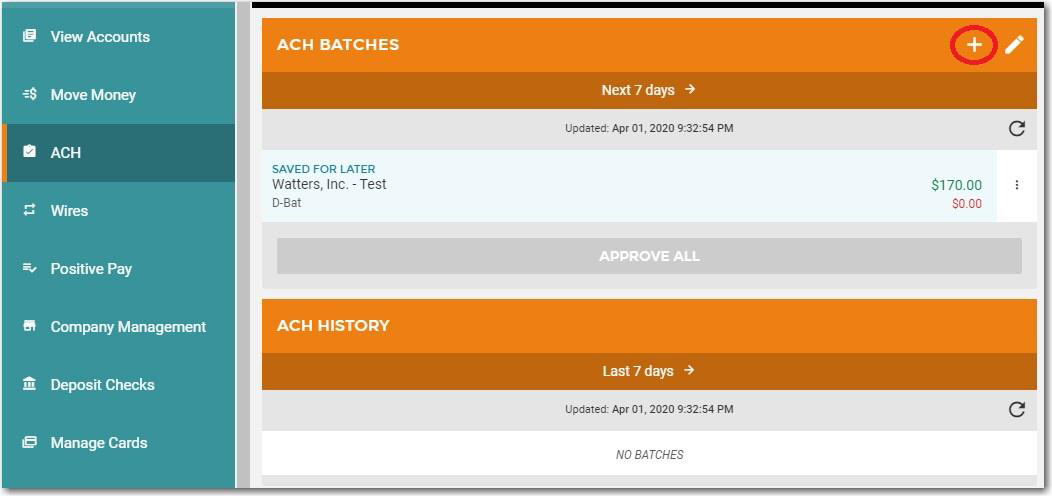
2. Begin Batch Creation This will take you to a screen displaying all Scheduled ACH Batches, Tax Payments, and ACH History. To start the manual ACH batch creation process, you will need to select the+ button near the top of page. This will enable the ACH batch wizard that can guide you through various workflows including manually creating a new batch, using a previously created batch template, uploading an ACH file, or managing templates.
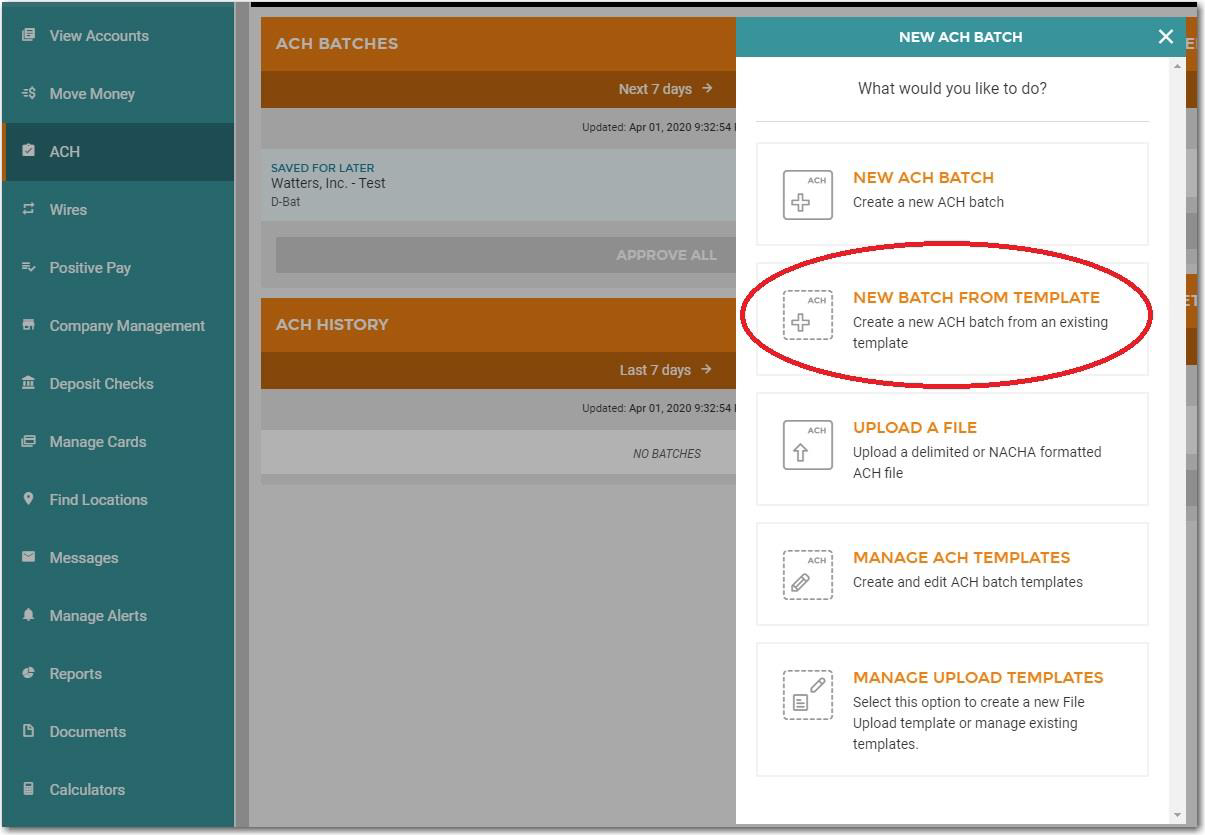
3. Select “New Batch from Template” On the screen below, select New Batch From Template.
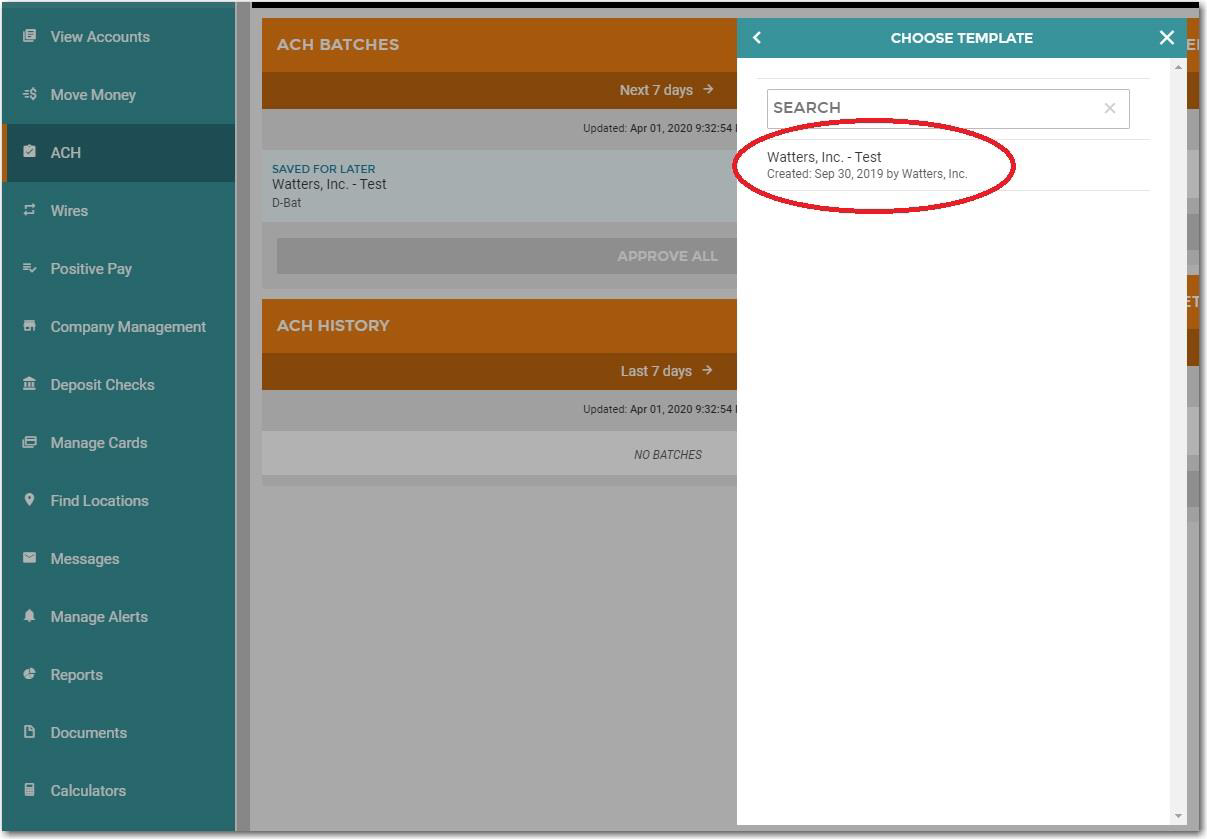
4. Select the Template On this screen, you should see a list of your ACH Templates. Choose the one you wish to use.
5. Verify Batch Detail Information Verify the batch detail information. If the details need to be updated, please make the appropriate changes. Once all required fields have been verified, click Add Recipients at the bottom of the screen to proceed to the next step.
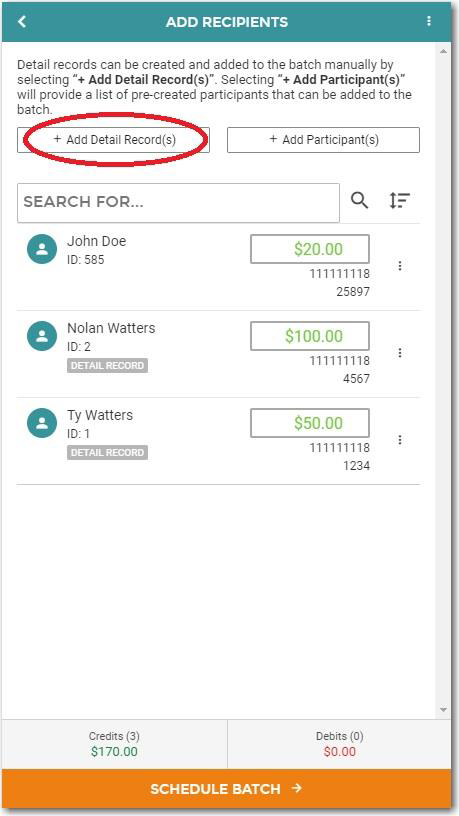
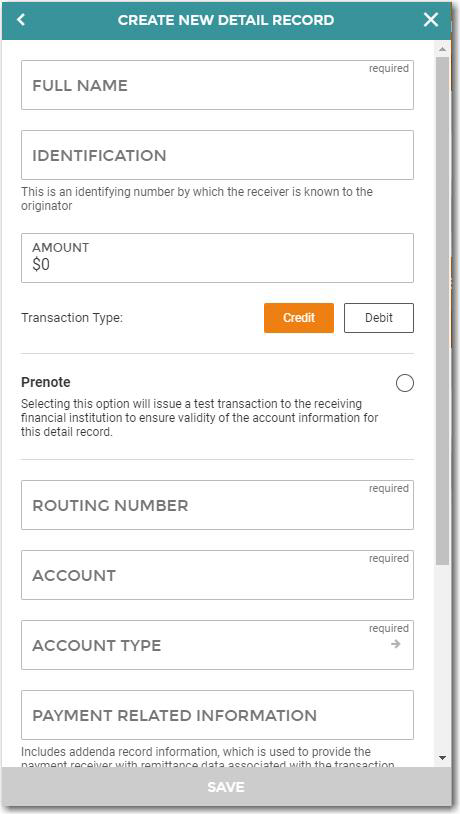
6. Edit Payees/Recipients This step allows you to verify your Payees/Recipients and add or remove Payees/Recipients There are two ways to accomplish this.
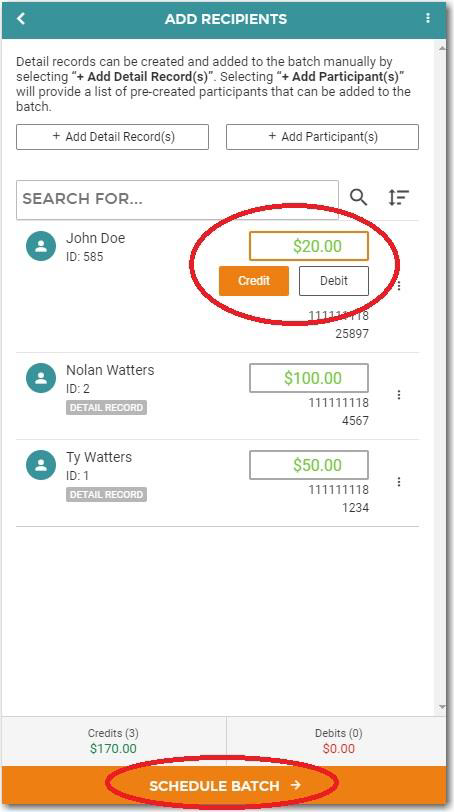
7. Edit Amount for Payees/Payers Once you have edited recipients, you will need to verify recipient amounts and transaction types (Credit or Debit – Only applicable if you can originate both transaction types). Once all amounts reflect the correct amounts, click Schedule Batch to move to the next step. NOTE: If an entry is left blank or has $0.00, the transaction will be dropped from the processing file. So, if you have an employee on vacation and you don’t want to completely remove them from the batch, just set the amount to $0.00.
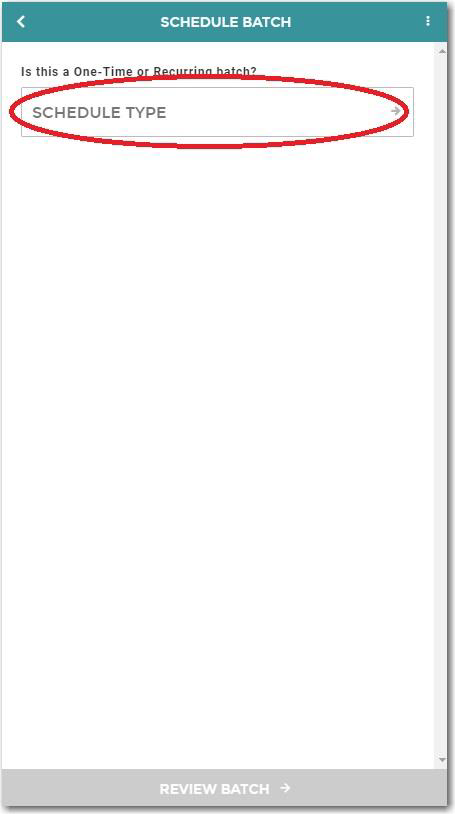
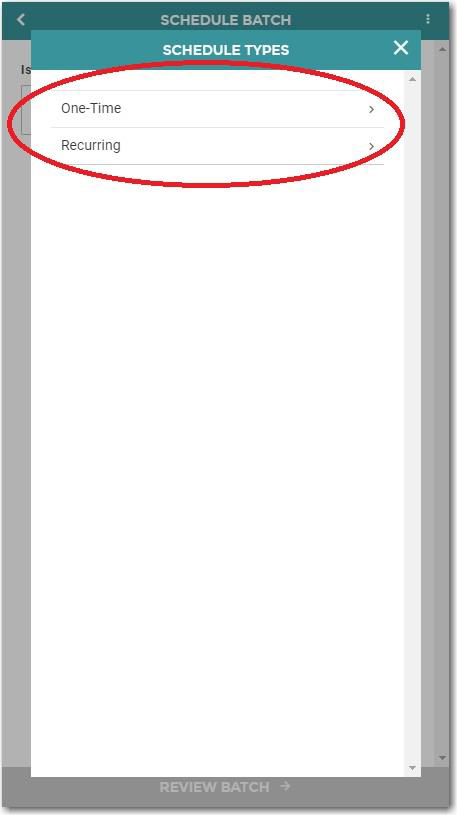
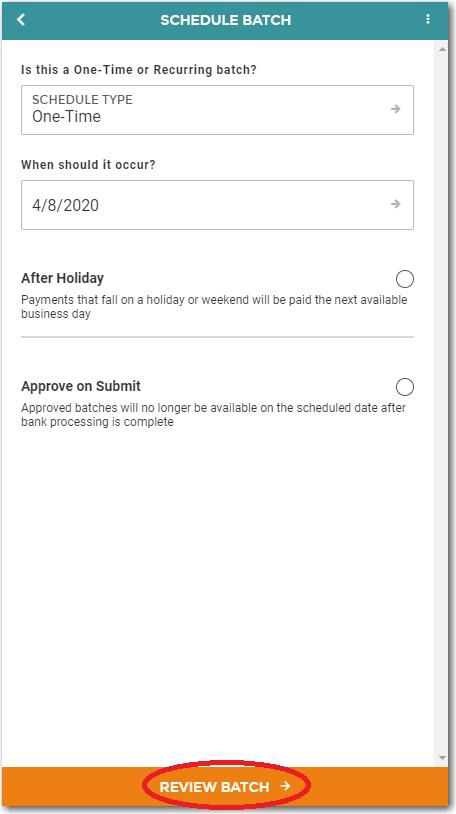
8. Schedule the Batch The next screen prompts you to schedule the batch. You will be prompted to determine whether you would like the batch to be a one-time batch or recurring. You can also select the effective date and whether you would like the batch to be paid before or after a holiday or weekend if the effective date falls on one of these days. When finished, select the Review Batch button at the bottom of the screen.
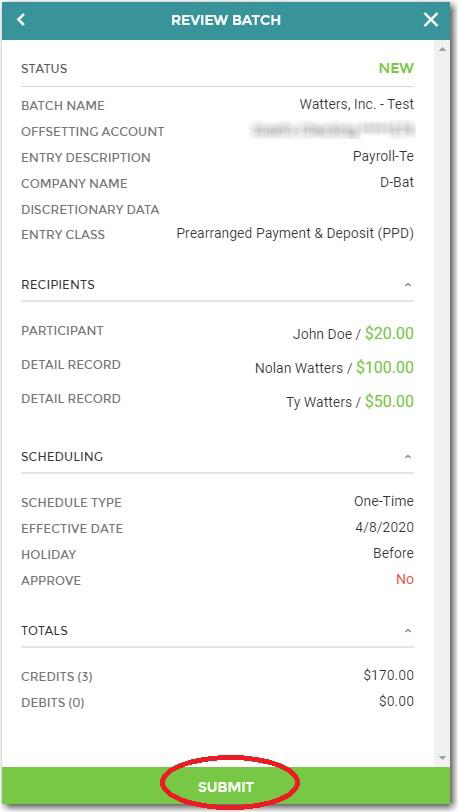
9. Submit the Batch In the next step, the Review Batch screen will provide an overview of the details for the batch you’ve created. If everything looks good, click Submit (depending on your permissions, this button may say Approve and Submit).
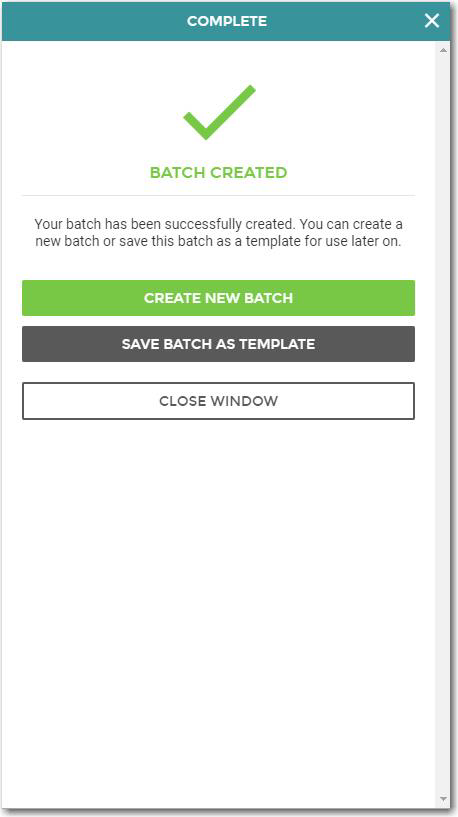
Once completed, you will receive a success screen with a green check mark as shown below.
68427
| ||||


| Top of Page |
Customer Portal
Send Feedback
Print |
||
|
|||