Security Roles
If a user is to be granted update capabilities, the Site Administrator can modify the user’s security by first entering the User Directory via the Users icon along the top of the screen and selecting the desired user. Additional instruction on this process can be found in the User chapter of the CSI Secure Connect All User’s manual.
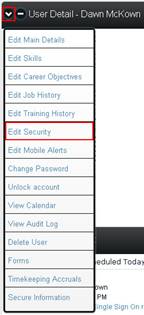
Click the dropdown arrow at the top of the User Detail box and select Edit Security from the menu.
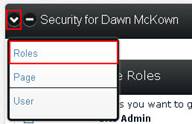
The Administrative Roles section will appear at the top of the page, or you may click the dropdown arrow at the top of the Security for (user) box and select Roles.
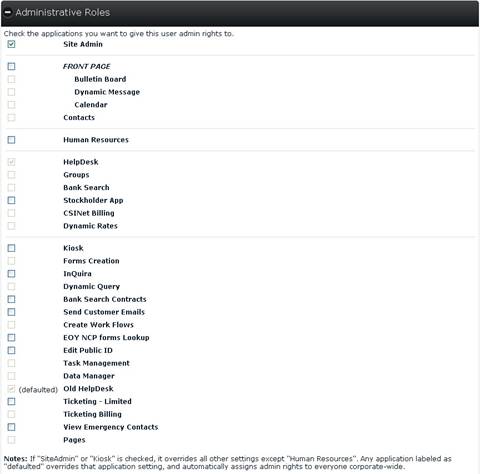
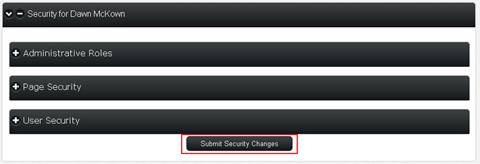
Check the box(es) beside the application(s) you want to give this particular user admin right to and click the Submit Security Changes button at the bottom of the screen. The user must log out of CSI Secure Connect and re-establish the session before the changes will take effect.
NOTE: If an application/box is greyed out, it is either because everyone has access to that application (marked as “defaulted”), or all site administrators have access and the user is a site admin.
Roles Defined
Site Admin: Grants all functions of other security settings except Kiosk. This is the only security level that opens Administrator functions under Site Navigation. The Site Administrator is also the only level of security that is able to set security on the User Profile to create new classification levels.
Front Page: Causes the Add option to appear on Bulletin Board, Dynamic Message, Calendar and Contacts dropdown menus. The Add option allows the user to post new entries.
Bulletin Board: Causes the Add and Manage options to appear on the Bulletin Board dropdown menu. The Add option allows the user to post new entries, while the Manage option allows users to Edit or Delete any items they have entered.
Dynamic Message: Causes the Add and Manage options to appear on the Dynamic Message dropdown menu. The Add option allows the user to post new entries, while the Manage option allows users to Edit or Delete any items they have entered.
Calendar: Causes the Add option to appear on the Calendar dropdown menu. The Add option allows the user to post new entries and edit events that are posted by this particular user.
Contacts: Causes the Add Contact and Add Company or Project options to appear on Contacts dropdown menu. The Add options allow the user to post new entries. Users will also be able to edit contact information.
Human Resources: Allows the user to view encrypted user information. The Secure Information option located on each user’s profile (after selecting Edit Main Details) will display, allowing the viewing of this information. The Forms menu will be displayed on all users. To allow for the creation of HR forms, this will cause the Edit Custom Forms option to appear when the Forms option is chosen from the Employee Directory profile on the person with this security setting. Human Resources security also allows the user to view social security numbers and other information in the Timekeeping system.
Task Management: Causes the Edit Issues and Search All buttons to appear on the Help Desk. These buttons are needed in order to add new issues and review the entire database of issues.
Groups: Causes the Corporate Group option to appear on the Groups screen.
Dynamic Rates: Causes the Rates Administrator menu to appear on the Rates home page. This allows the user to add, change and update rates.
Kiosk: Sets the logon for any account with this security to“view only.” Kiosk overrides any company-wide default settings. This is great for a break room where multiple people have a need to view the Intranet.
Forms Creation: Gives the user the ability to create, change and update forms and surveys by using the Forms/Survey Creation tool.
Dynamic Query: Used to pull information from CSI Secure Connect tables. Allows the user to create and view Dynamic Query reports.
Bank Search Contracts: Used to grant write and report access to contracts.
Send Customer Emails: Gives the user the ability to send notices to customers via the Bank Search emailing system.
Create Work Flows: Allows the user to create, change and update Work Flows by using the Work Flow tool.
EOY NCP forms Lookup: Allows the user to look up EOY forms for his/her bank.
Edit Public ID: Allows the user to edit the Public ID of other users.
E-Business Custom Apps: CSINet Billing.
Data Manager: Allows the user to manage and administer fields and databases entities.
Ticketing – Limited: Allows people, such as phone operators, to change the secondary status and add comments.
Ticketing Billing: Allows the user to add billing items on a ticket.
View Emergency Contacts: Allows the user to view the emergency contact information for all employees.
Pages: Allows the creation of pages.
NOTE: If SiteAdmin or Kiosk are checked, they override all other settings except Human Resources. Any application labeled "defaulted" overrides that application setting and automatically assigns admin rights to everyone corporate-wide.