 Customer Portal
Send Feedback
Print
Customer Portal
Send Feedback
Print
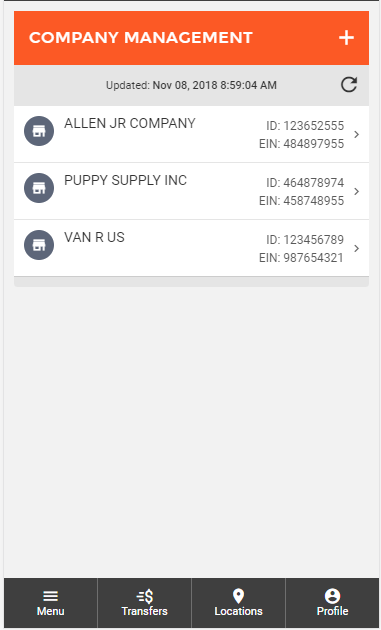
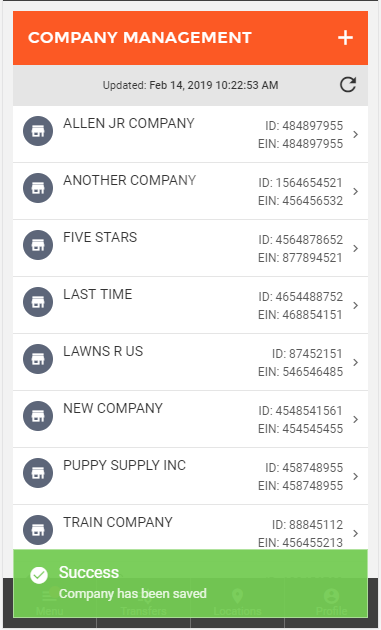
Create New CompanyThe Company Management page is where you can see all existing companies and create new companies. To begin creating a new company, click on the "+" button near the top right of the page. This will bring up the New Company wizard.
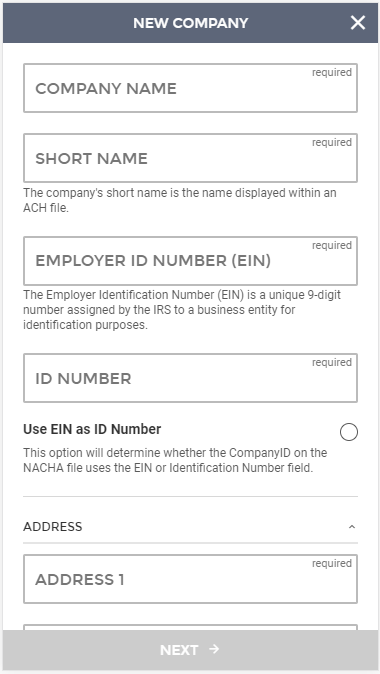
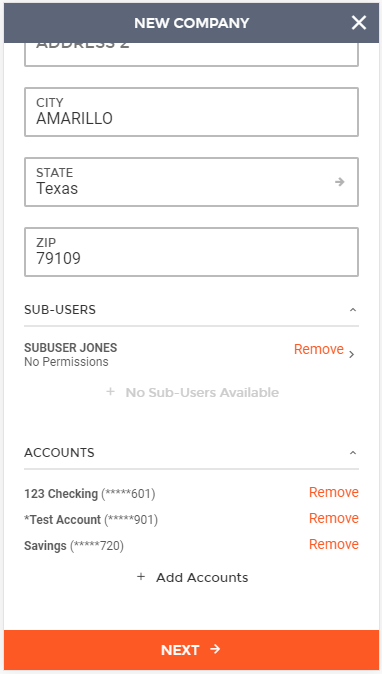
The New Company wizard will help guide you through the process of creating a new company. The first step in creating a new company is entering the necessary information, including:
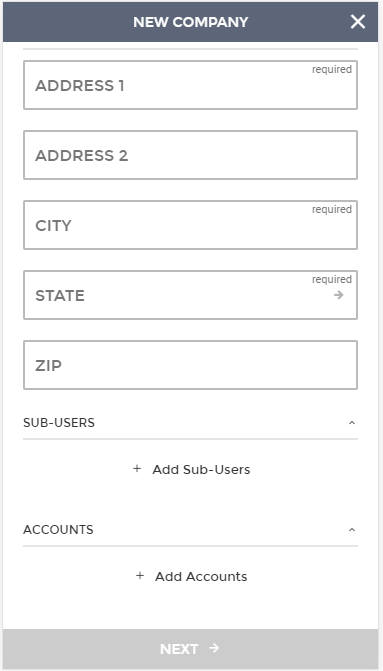
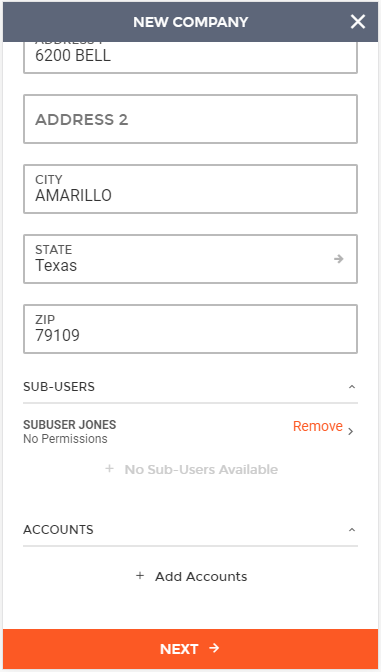
Sub-users can be added to a company by clicking the + Add Sub-Users button.
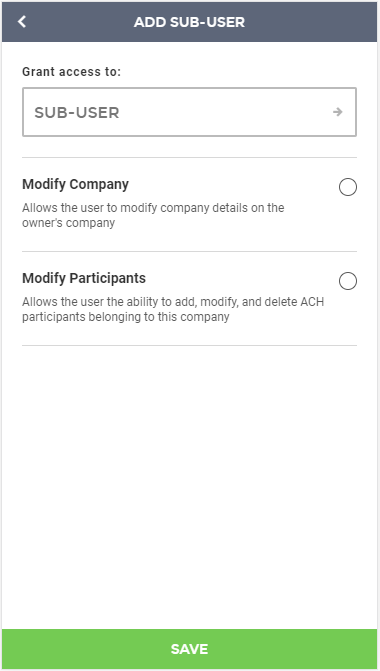
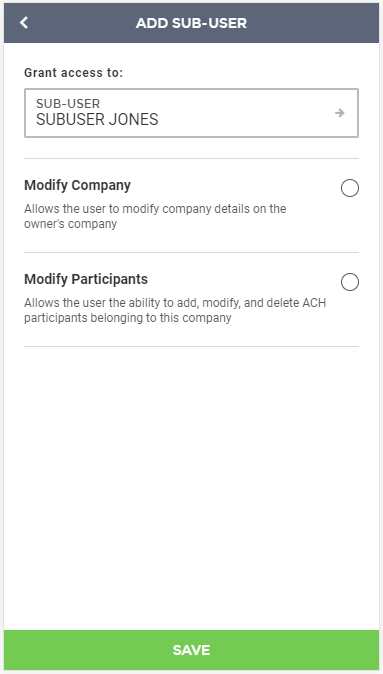
The Add Sub-User screen will be displayed. Users can select the sub-user they wish to add by clicking on the Sub-User field.
All existing sub-users will be displayed. Click on the sub-user you would like to add.
The selected sub-user will be displayed in the Add Sub-User screen. Two permissions are displayed for sub-users - Modify Company and Modify Participants. Once all fields are set as desired, click save.
Once saved, the sub-user will be listed in the sub-users section.
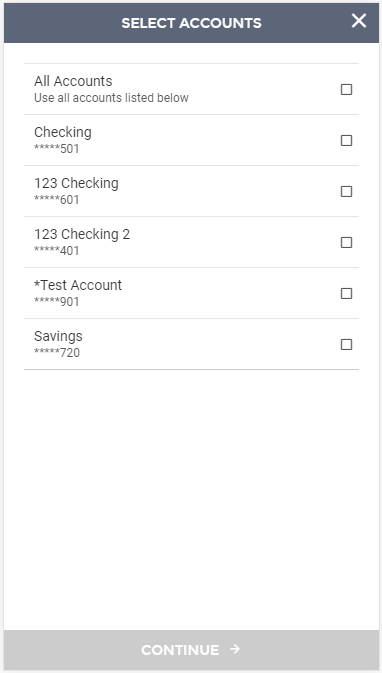
Accounts can be added to a company by clicking the + Add Accounts button. The Select Accounts screen will be displayed. All existing checking and savings accounts will be displayed. Users can select the account(s) they wish to add and then clicking the continue button.
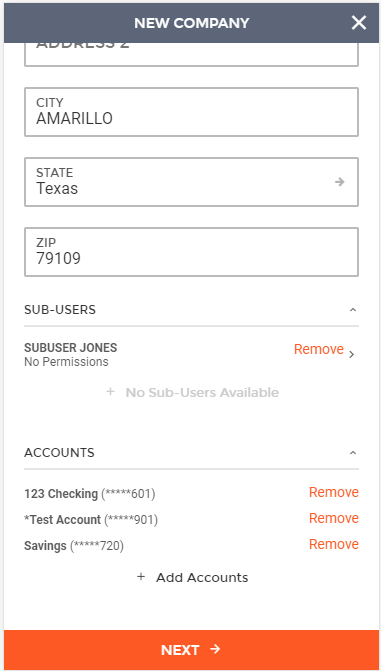
The selected accounts will be listed in the accounts section of the New Company screen. Sub-users and accounts can be removed by clicking the Remove button for the desired account or sub-user.
Once all required fields have been filled out, you can click "Next" at the bottom of the screen to proceed.
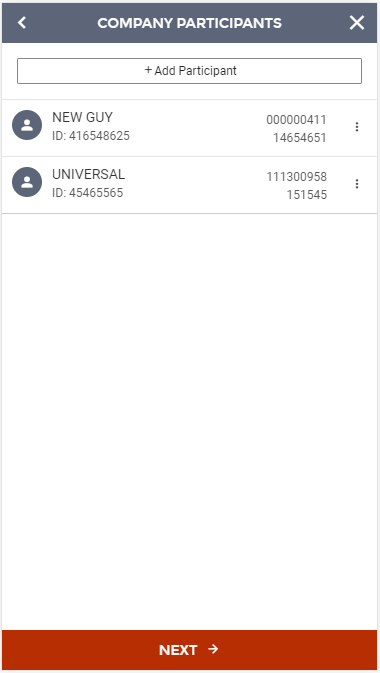
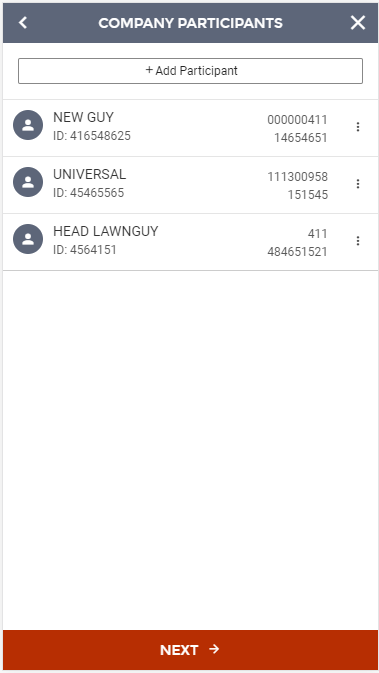
Next, you’ll be directed to the Company Participants screen. Any existing universal participants will be displayed. To add a new participant to the company, click the + Add Participant button. If no participants need to be added, click the Next button.
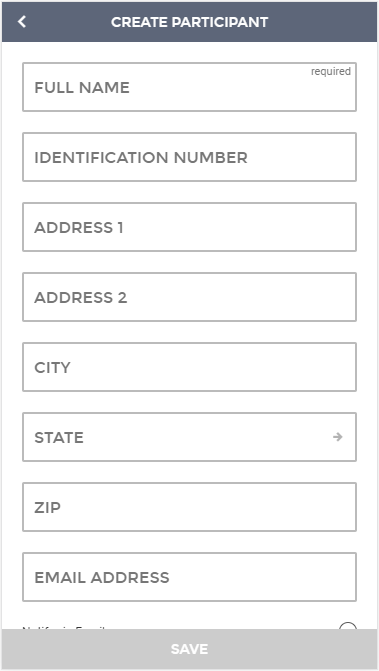
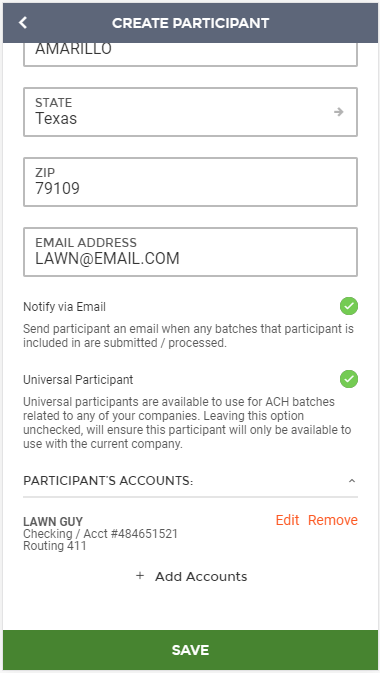
To create a new participant, enter participant information and then scroll down to add an account to the participant.
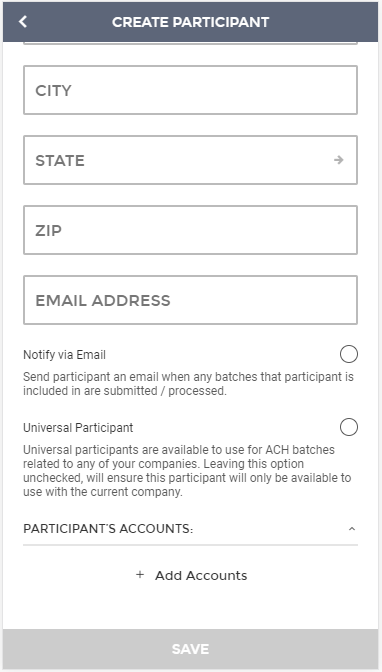
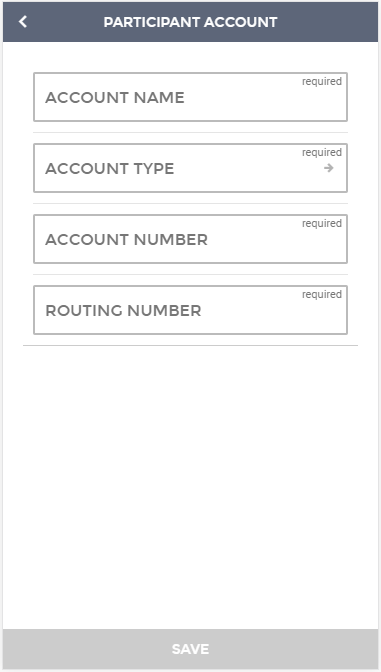
Account(s) can be added by clicking the + Add Accounts button.
The Participant Account screen will be displayed. Enter values for all fields and then click the save button to add it to the participant.
Once all desired information and fields have been added, click Save to add the participant to the company.
The new participant will be displayed on the Company Participants screen. Once all desired participants are added, click the Next button to move on.
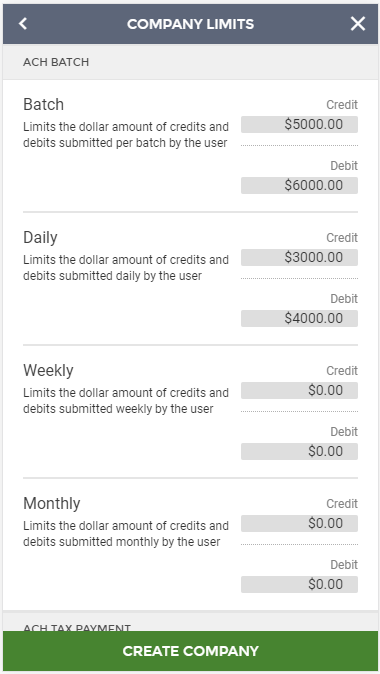
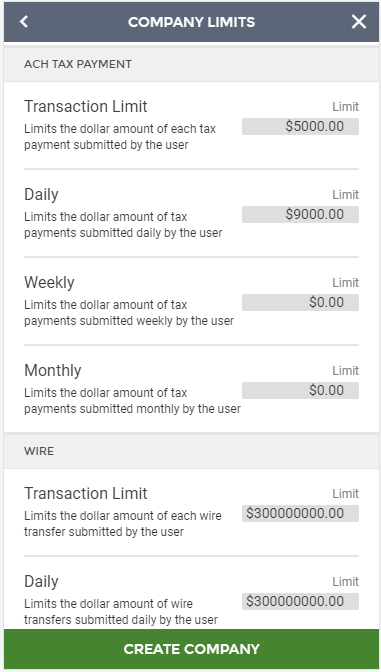
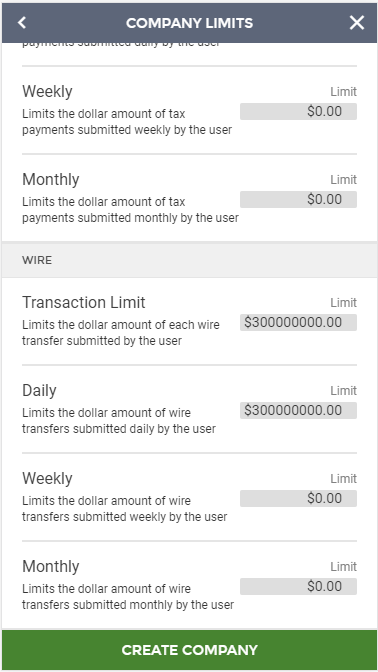
Company Limits are then displayed for the new company. Review the limits and click the Create Company button to complete setup of the new company.
The new company will be displayed on the Company Management screen.
66426
| ||||

| Top of Page |
Customer Portal
Send Feedback
Print |
||
|
|||