Manual ACH Batch Creation
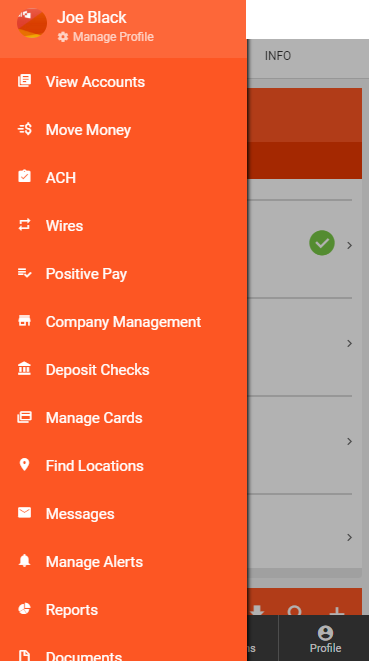
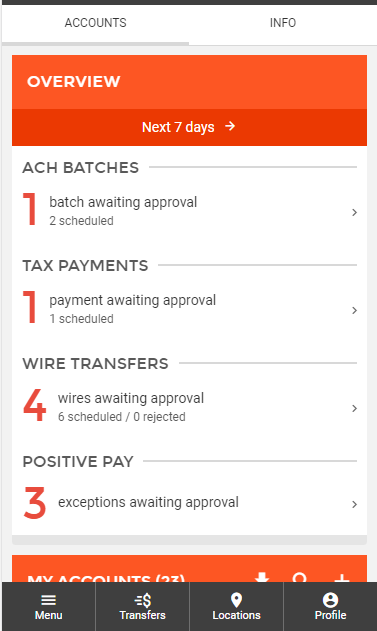
To begin creating a new ACH batch, you can either click on the "ACH" menu item within the menu on the left side of the screen, or by clicking on the ACH batches section of the Overview on the landing page.
This will take you to a screen displaying all Scheduled ACH Batches, Tax Payments, and ACH History.
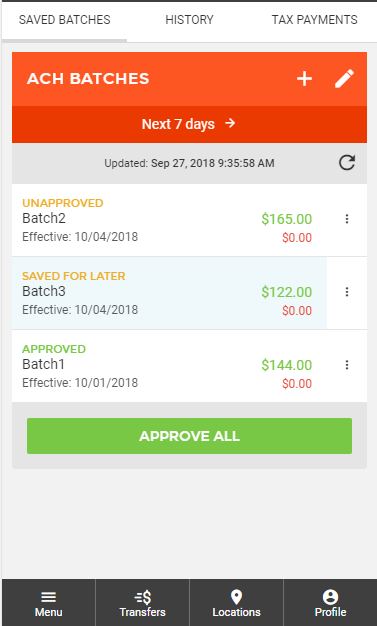
To create a new scheduled ACH batch, select the + icon. You will then be able to select from the following options:
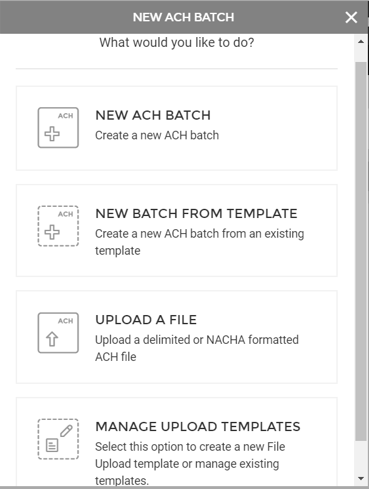
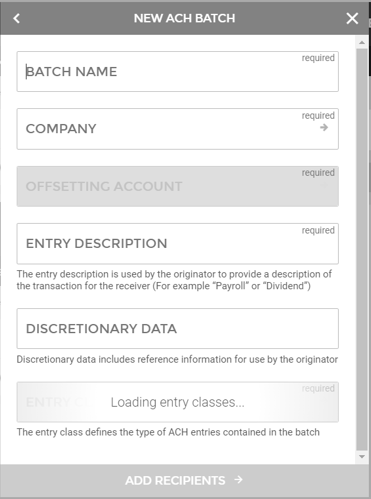
- Batch Name: This field is defined by the user creating the batch. The name is only used to identify the batch and will not be used in creating the NACHA file that is sent to FED.
- Company: All records will have the company name associated with them, and a filter is allowed based on the name. Use the arrow to select the company you wish to identify yourself as when originating this batch.
- Offsetting Account: Use the arrow to select an offsetting account that is linked to your login and has the appropriate rights for ACH file creation.
- Entry Desc: Ten-character alphanumeric description of the transactions in this batch. This will be included in the transaction file sent to FED. It is followed by the name of the submitter, IP address, and geographical location of where it was submitted.
- Discretionary Data: This Describes the type of transaction you are processing. This is a 20-character alphanumeric field that is usually less accessible than the Entry Description, but can contain twice the data.
- Payment Related Information: This can describe the type of transaction you are processing. This field is 20 characters alphanumeric that is usually less accessible than the Entry Description but can contain twice the data.
- Display name and Company Identification: This non-editable information is populated when you select a Company.
- SEC: This is an Entry Class field. It describes the type of transaction to FED and the Receiving Institution. The SEC codes that are available for customers to choose when creating a batch are determined off of the financial institution’s settings. Use the arrow to select the appropriate choice.
- CCD – Cash Concentration or Disbursement - Used to credit or debit business accounts. This is the most commonly used in business-to-business transactions.
- CTX – Corporate Trade Exchange – Used to transfer funds within a trading partner relationship. ANSI ASC X12 message or payment related information will be included in multiple addenda records.
- PPD – Prearranged Payment and Deposits - Used to credit or debit a consumer account. This is the most commonly used for payroll deposits and preauthorized bill payments.
- RCK – Re-presented Check Entries - Used to debit a consumer or business account. It can only be used to electronically re-present a physical check that was returned because of insufficient funds or uncollected funds.
- TEL – Telephone-Initiated Entry – Used for the origination of a Single Entry debit transaction to a consumer’s account following an oral authorization obtained from the customer via the telephone. It can only be used when there is either (1) an existing relationship between the originator and the receiver, or (2) no existing relationship between the originator and the receiver, but the receiver has initiated the telephone call.
- WEB – Web Initiated Entry - Used to debit a consumer account. It can only be used if electronic authorization through the Internet was given to create an ACH item.
Select Add Recipients to move to the next screen.
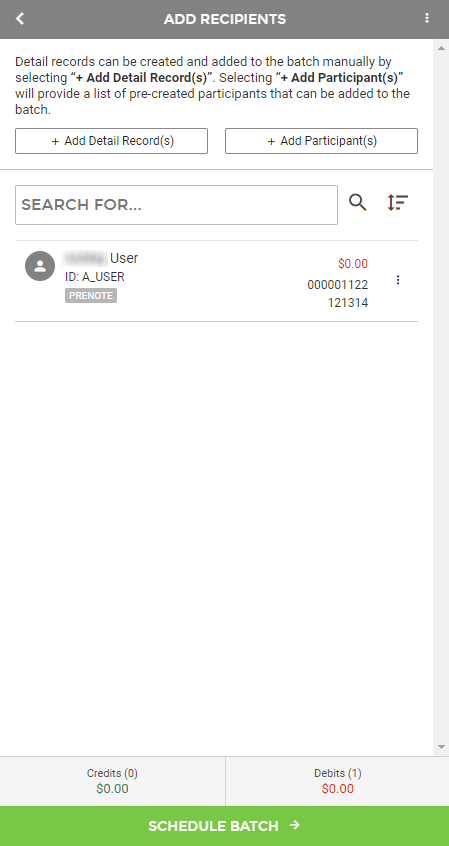
From this screen, you can add detail records and participants.
You can then select Schedule Batch to move to the next screen:
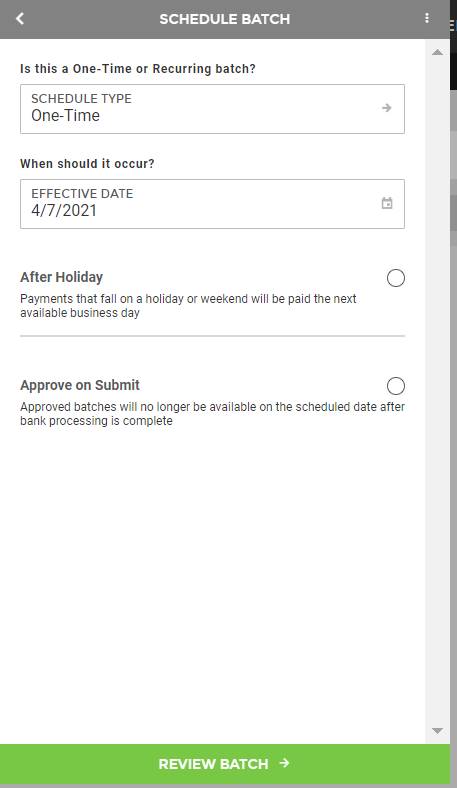
- Schedule Type: This field will determine if the batch should be a One-Time transaction or a recurring transaction.
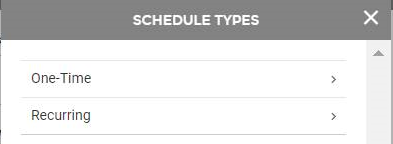
- How often should it occur?
- One Time
Specific Date will allow you to select the date you wish the money to batch. Either enter the date in the date field or use the calendar button to select a date.
- Recurring
Weekly: will allow this batch to take place weekly on the day of the week that you choose, by selecting a day in the drop-down day of week. You will need to pick a day of the week either on (or near) the same day of the week the first payment was scheduled.
Every Other Week: will allow this batch to take place every other week. You will need to pick a day of the week, either on (or near) the same day of the week the first payment was scheduled.
Monthly: will allow this batch to take place once a month. You will need to pick the day of the month either on (or near) the day of the month the first payment was scheduled.
Every Other Month: will allow this batch to take place every other month (or every two months). You will need to pick the day of the month either on (or near) the day of the month the first payment was scheduled.
Every Three Months: will allow this batch to take place every three months. You will need to pick a day of the month either on (or near) the day of the month the first payment was scheduled.
Every Six Months: will allow this batch to take place every six months. You will need to pick a day of the month either on (or near) the day of the month the first payment was scheduled.
Yearly: will allow this batch to take place once a year (or every 12 months). You will need to pick a month and a day of the month on (or near) the date the first payment was scheduled.
- Ending Date: Enter a date in which you want the automatic batch to stop if you have selected Recurring.
- Holiday: If your batch falls on a holiday, you have the option to set it to process the next business day after the holiday.
Once all selections are made, select Review Batch.
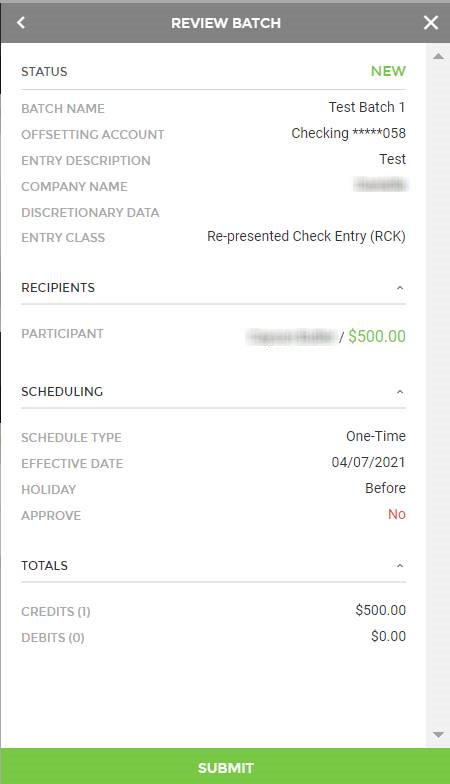
A review screen will then appear. If all fields are correct, select Submit.
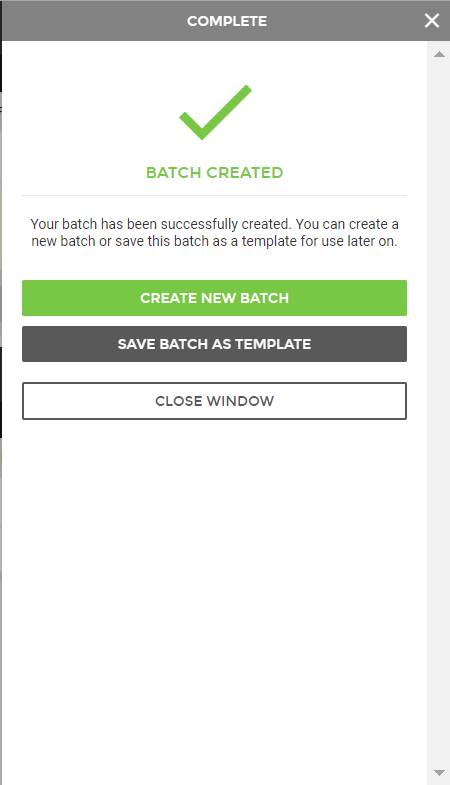
A confirmation screen will appear:
65819
|
 Customer Portal
 Send Feedback
 Print
Print  Customer Portal
 Send Feedback
 Print
Print 


