 Customer Portal
Send Feedback
Print
Customer Portal
Send Feedback
Print
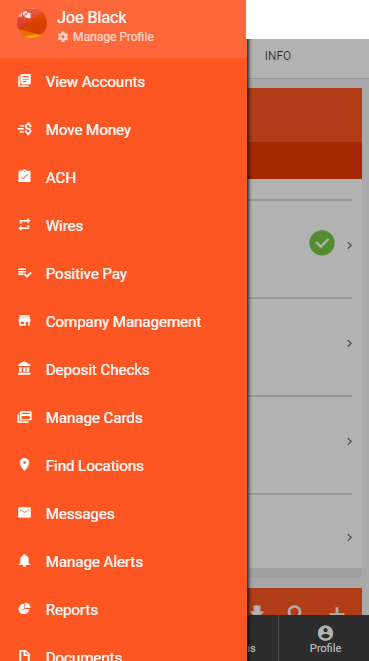
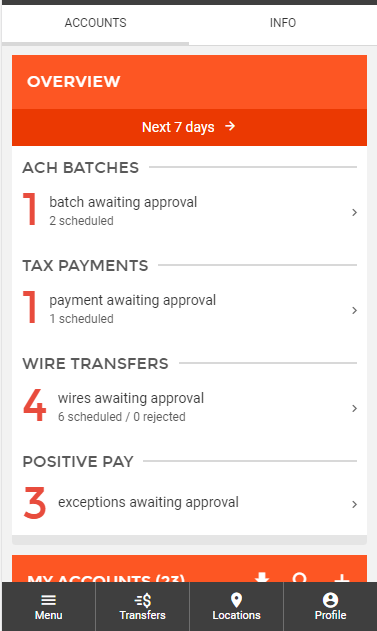
Creating an ACH Batch from a Pre-Existing ACH TemplateTo begin creating a new ACH batch using a pre-existing template, you can either click on the "ACH" menu item within the menu on the left side of the screen, or by clicking on the ACH batches section of the Overview on the landing page.
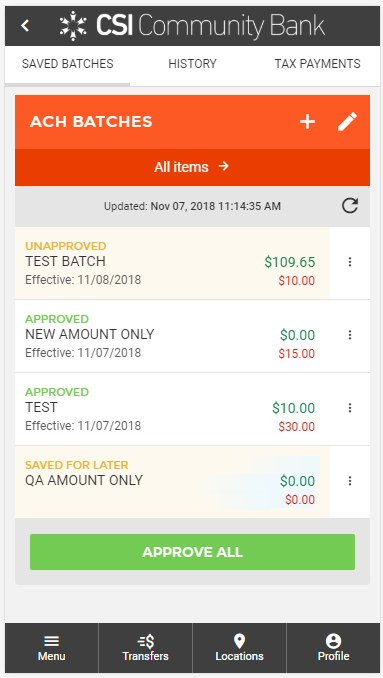
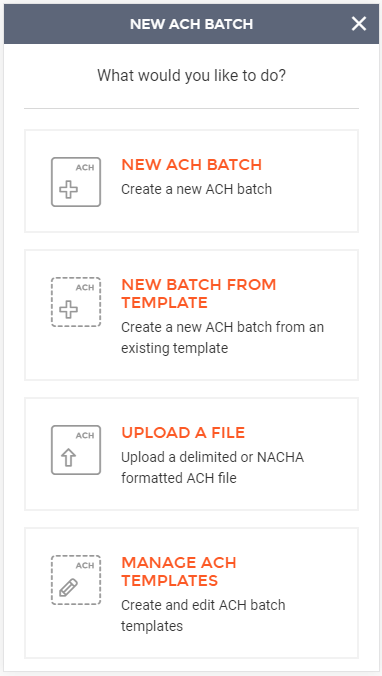
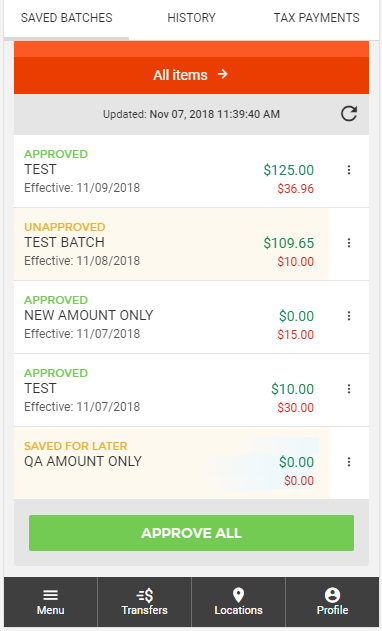
This will take you to a screen displaying all Scheduled ACH Batches, Tax Payments, and ACH History. To start the manual ACH batch creation process, you will need to click the "+" button near the top of page. This will enable the ACH batch wizard, guiding you through various workflows including: manually creating a new batch, using a previously created batch template, uploading an ACH file, or template management. Clicking on the button labeled "New Batch from Template" will take you through the ACH batch wizard.
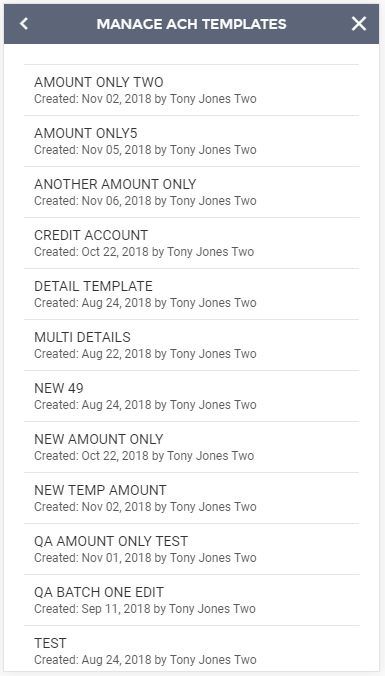
The first step is to select the template you wish to use. These templates can be managed as set up by going to the previous step and selecting "Manage ACH Templates".
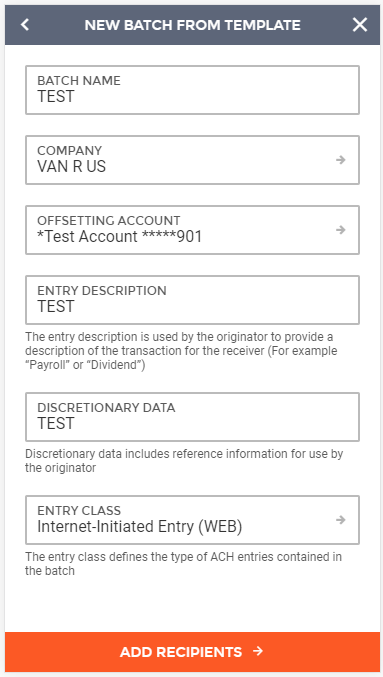
Since you are using a template, all fields that were filled out for the template will be automatically filled out in this step. After selecting your template, you will next see all the necessary header information, including:
Once all required fields have been filled out and reviewed, you can click "Add Recipients" at the bottom of the screen to proceed to the next step.
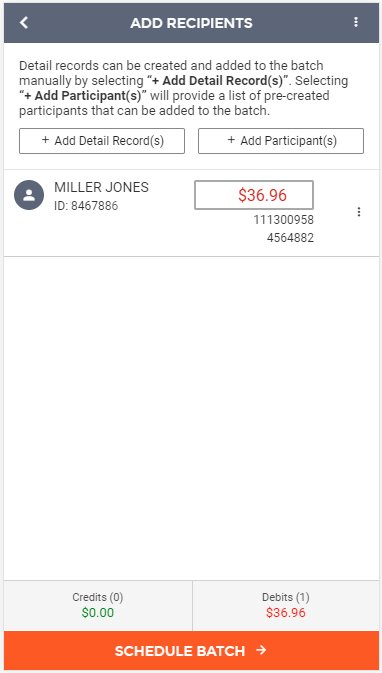
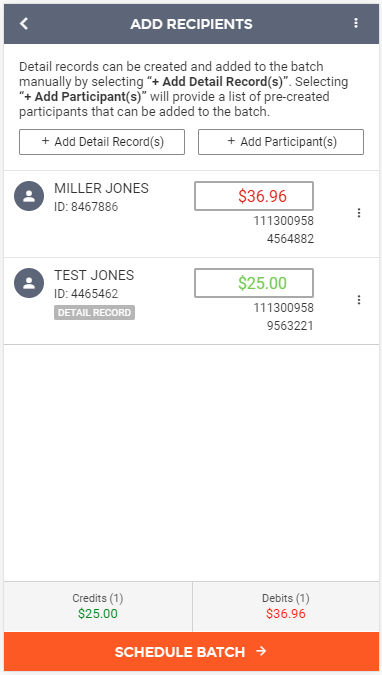
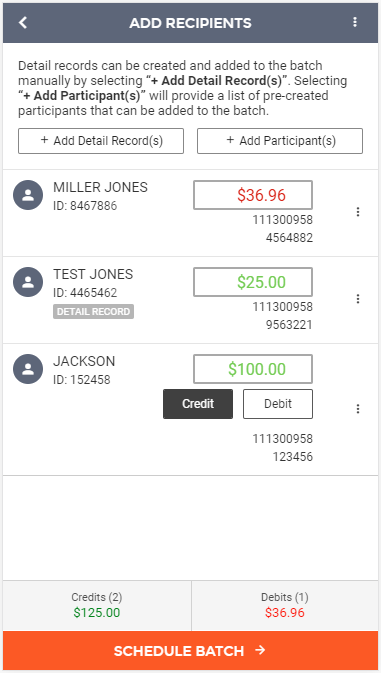
The next step in creating a new ACH batch from template is adding recipients (also known as detail records) to the batch. Since you are using a template, you may already have all the detail records already built into the batch. If not, you can add additional detail records to the batch via two different methods. The first includes the "+ Add Detail Record(s)" option, which allows the manual addition of new participants. The second includes the "+ Add Participant(s)" option, which allows you to select from a list of participants that have been built under a company.
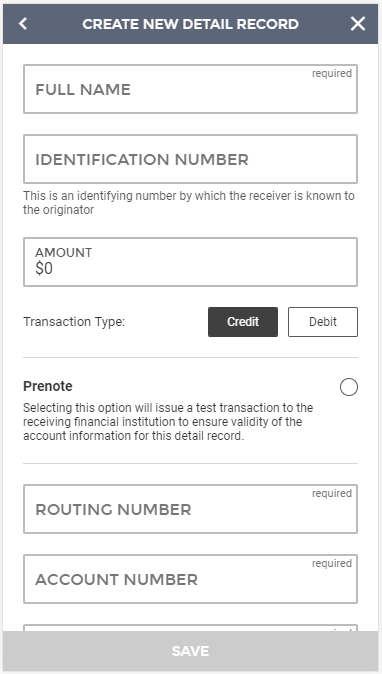
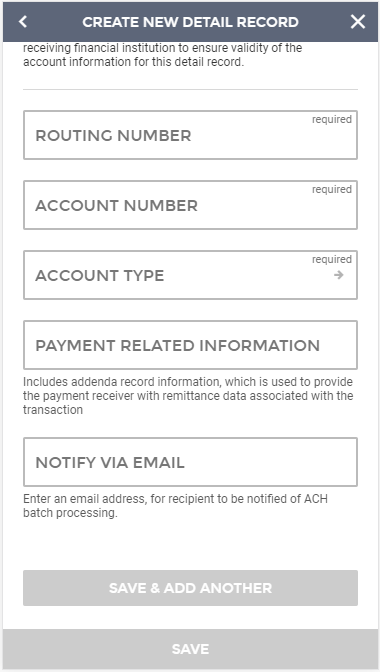
Selecting the "+ Add Detail Record(s)" option will take you to a screen where individual recipients (also known as detail records) can be added to the batch. Here you will enter all the recipient’s information, including:
Once these fields have been filled out for the detail record, you can click the "Save & Add Another" option, near the bottom of the screen, if you would like to manually add more detail records. If you are finished adding detail records you can click the "Save" option at the bottom of the screen. Once this is done, you will be taken back to the "Add Recipients" page of the ACH batch wizard. If you are ready to schedule the batch, you can click "Schedule Batch" at the bottom of the screen, taking you to the schedule screen.
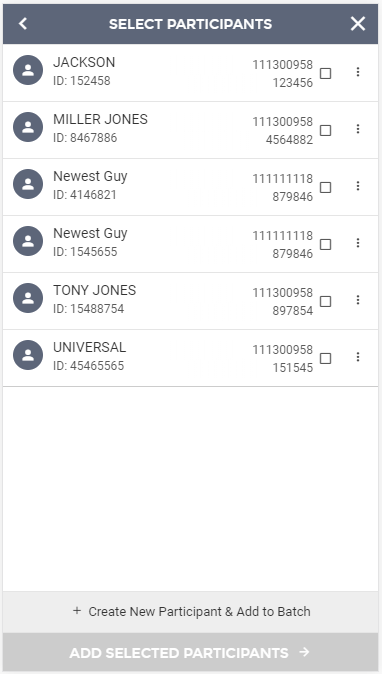
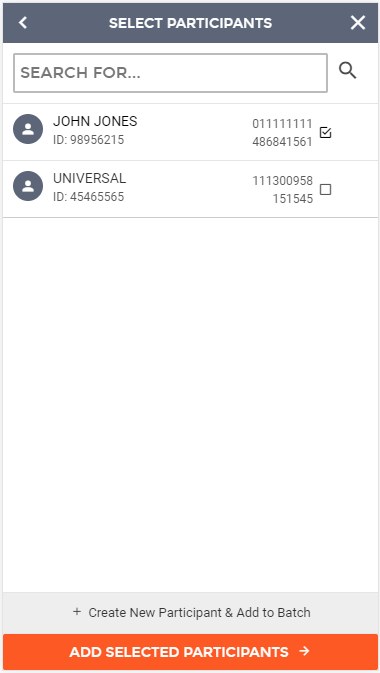
Selecting the "+ Add Participant(s)" option will take you to a screen where all participants built under this company are listed and can be selected for addition to the batch. All details associated with the participant will automatically be moved into the batch upon selection.
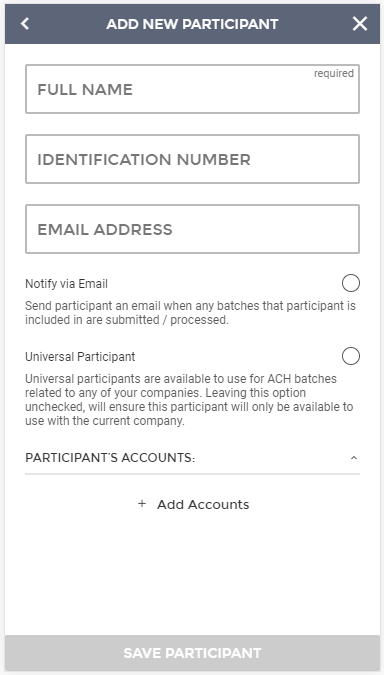
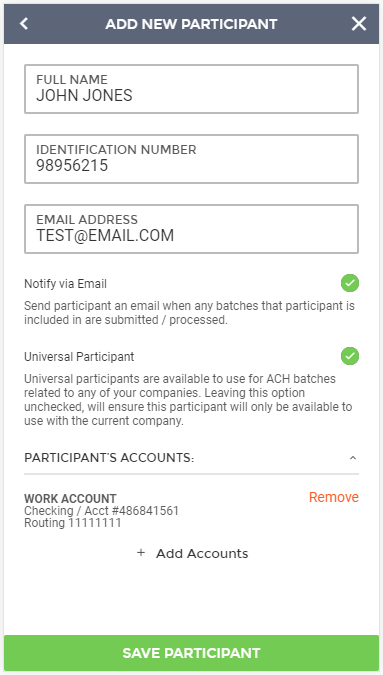
If you do not see the participant you are looking for, you can also create new participants from this screen and include them in the current batch. To accomplish this, click the "+ Create New Participant & Add to Batch" button. Selecting the "+ Create New Participant & Add to Batch" option will take you to the Add New Participant screen. Here you will enter all the participant’s information, including:
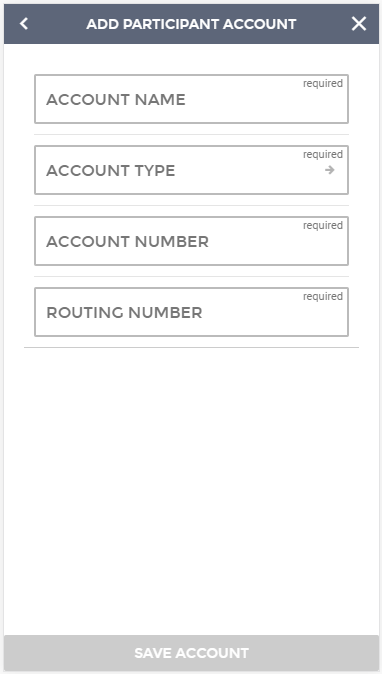
A participant account must be added to save the participant. You can click the "+ Add Accounts" button to add an account. Selecting the "+ Add Accounts" button will take you to the Add Participant Account screen. Here you will enter all the account information, including:
Once these fields have been filled out for the participant account, you can click the "Save Account" option near the bottom of the screen. Once this is done, you will be taken back to the "Add New Participants" page. If you are ready to save the participant, click "Save Participant" at the bottom of the screen.
You will be directed back to the "Select Participants" screen where the participant you just created is marked for selection. You can create additional participants by clicking the "+Create New Participant & Add to Batch" button and going through the participant setup again. Once all desired participants have been selected, click the "Add Selected Participants" option at the bottom of the screen to add them to the batch.
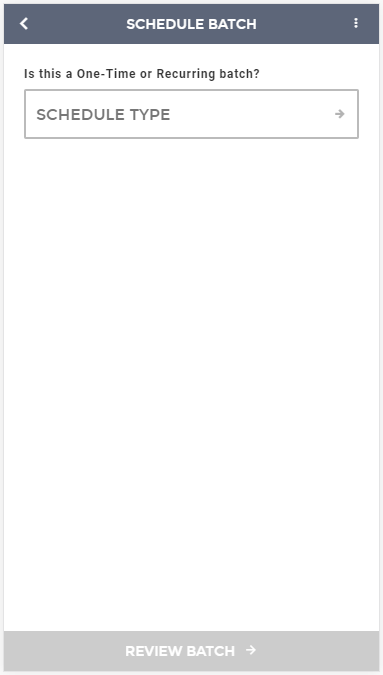
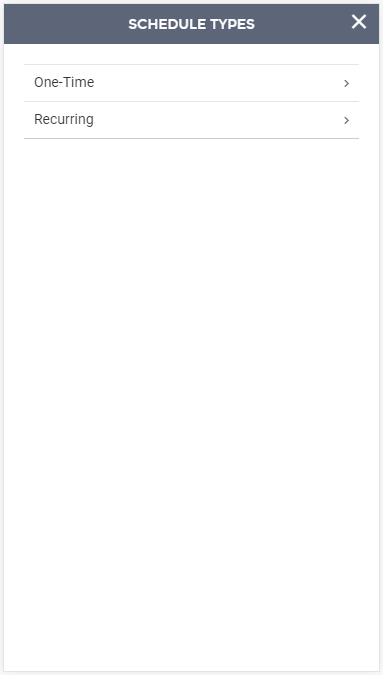
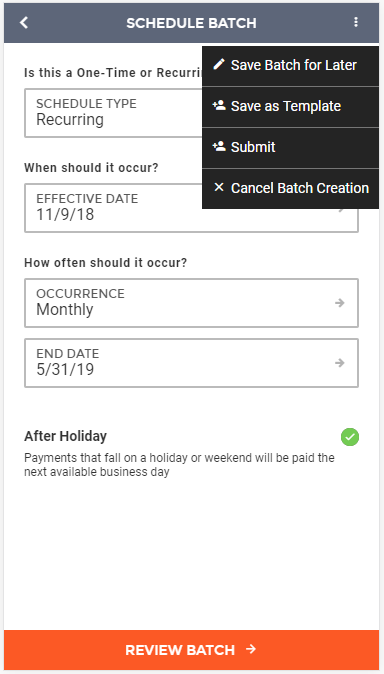
You will be directed back to the Add Recipients screen where the selected participants will be displayed. You will need to add an amount and designate the type of transaction for each participant on the Add Recipients screen. Once all detail records have been added to the ACH batch and you are ready to submit the batch, you can click the "Schedule Batch" option at the bottom of the screen. This will take you to the next screen where you can schedule the batch, determining whether you would like it to be a one-time batch or a recurring batch. On this screen you can also select the effective date and whether you would like the batch to be paid before or after a holiday or weekend if the effective date falls on one of these days. When finished, you can click on the "Review Batch" button at the bottom of the screen, which will take you to the review screen for the ACH batch.
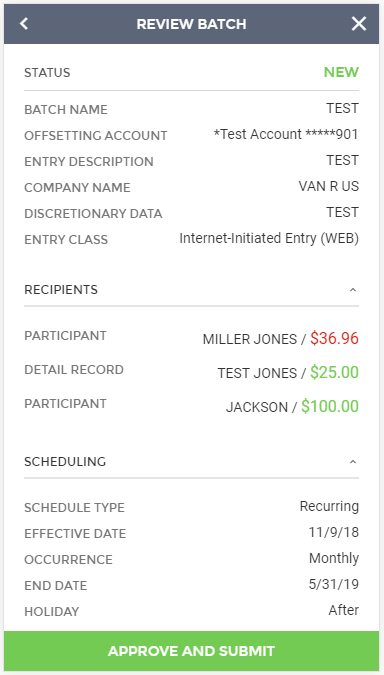
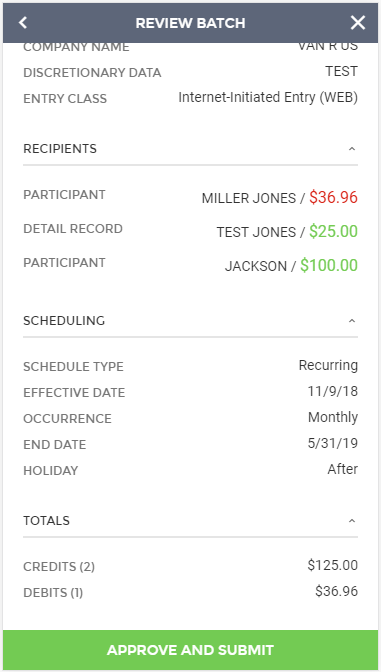
On the review screen, you will be able to see all details of the current ACH batch. This includes:
If all information contained within the review screen looks accurate, you can select to "Submit and Approve" (if you have access to approve your own batches), or to "Submit to Approver" if you require secondary approval before bank processing can occur.
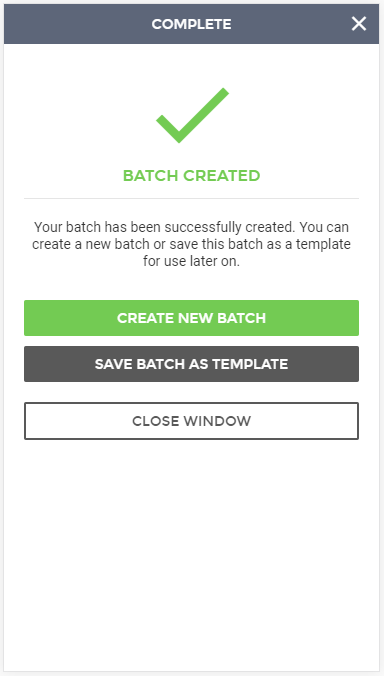
Upon finishing the process, you will see a success message, letting you know that the ACH batch was created properly.
Note: In the new user interface, ACH batches are saved as they are being created. If for some reason your session ends abruptly, or you decide to leave your device and your session times out, you can rest assured that the batch will be in a "Saved for Later" status on the ACH batch approval screen and on the Overview on the landing page of digital banking. In addition, at any point you would like to save a batch for later, you can click on the 3 dots in the top right portion of the ACH screen and select "Save for Later". Saving an ACH batch this way, will ensure that the batch information is saved, but is not submitted to an approver or to the bank until you are ready to do so.
65994
| ||||

| Top of Page |
Customer Portal
Send Feedback
Print |
||
|
|||