Customer Portal Send Feedback Print

Previous Topic

Next Topic

Book Contents

How Does the Positive Pay Process Work?

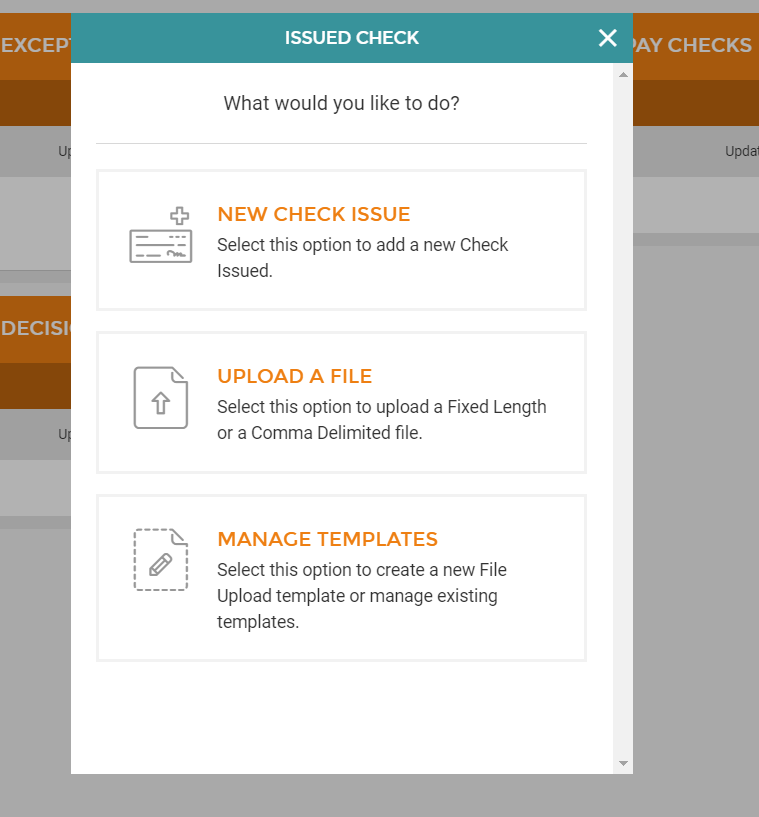
Step 1: Customer may add Issued Checks or Import a file

Note: The default cutoff for Positive Pay additions and decisions is 3:00 p.m. CST.

To manually add a check:

  1. Select + to manually add checks or import a file.

  2. Select the input method. You have the option to save import file formats as a template for future use.

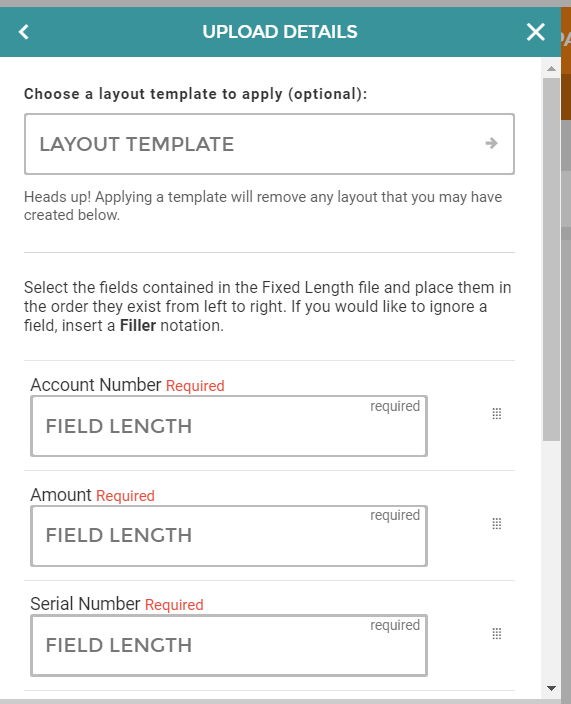
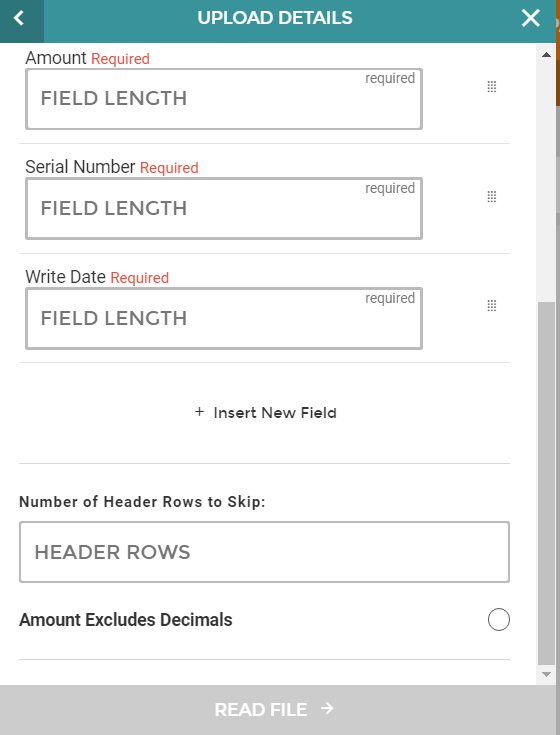
If the Customer Imports the File

The file can be one of two different formats:

  • Fixed Length
  • CSV (comma-separated values) / Comma Delimited
    • The user will select the fields that are contained in the file. The fields must be in the order they are saved in the CSV file.
    • Enter the number of lines to skip if any header information is included in the file.
    • If amounts in file exclude decimals, select that option at the end of the upload screen.

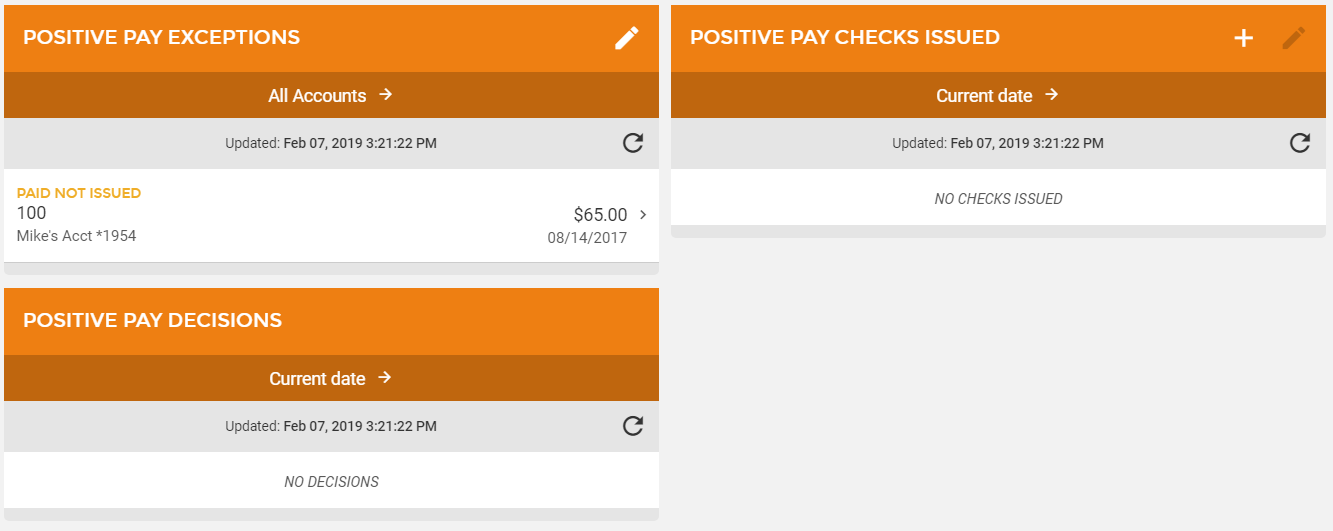
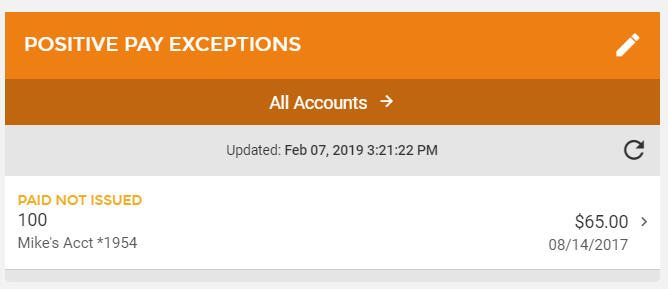
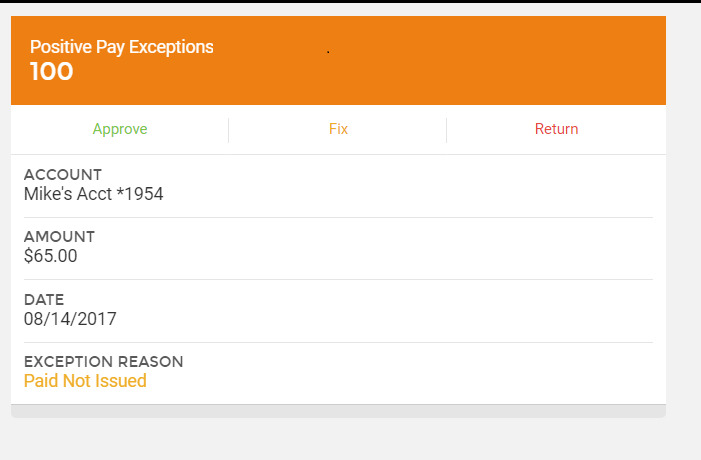
Step 2: Exceptions

Any exceptions will be listed for you to consider.

Select the appropriate decision.

Any previous decisions will be listed in on the main Positive Pay page and can be displayed by a date range.

Note: We recommend that Positive Pay customers set up the "Positive Pay Exception" alert. This will alert them anytime there is an exception that needs attention.**

68347

See Also

How to View Notices

How to Access Download Options

Enabling Peer to Peer (P2P) for a Customer

How to Register for Online Statements

How to Set Up a Company

How to Dispute a Transaction

Adding a New External Account (Checking or Savings) as a Customer

Text Banking Commands

RDC (Remote Deposit Capture)

ACH

Users

Top of Page Customer Portal Send Feedback Print