 Customer Portal
Send Feedback
Print
Customer Portal
Send Feedback
Print
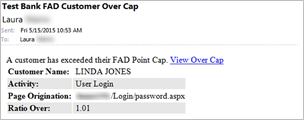
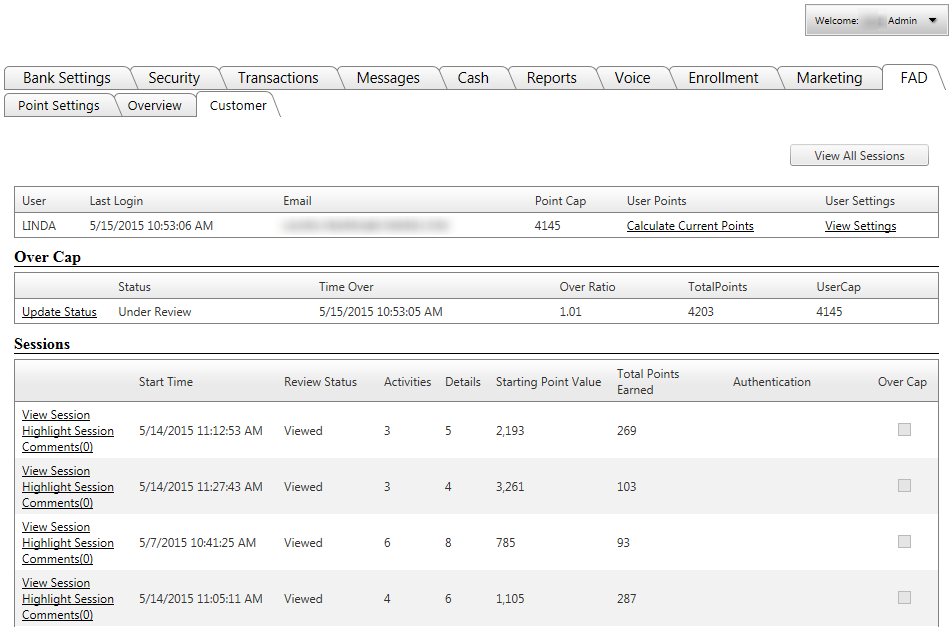
How does the over cap process work?As a customer takes actions that the system believes to be anomalous (based upon the last 6 months of activity [modifiable by the bank]), the point values for these business rules will begin to add up against a bank defined anomalous "Point Cap." Once the point cap has been broken for a user, a number of things will occur: 1. An email can be generated and sent out to any employee at the bank set up within the Digital Banking admin site. Example of Employee Email: The employee email contains the customer name, the activity they were performing when they went over the cap, the page they were on, and the ratio that they are over the cap. Employees can click on the View Over Cap link to view information regarding the user and their session, clicking the link will direct the employee to the Over Cap page for the customer. Note: The ratio over could change by the time the employee looks to the session. When the over the cap is viewed for that customer, it will take in the total points generated by the end of that session. For example, in this image It shows 1.01 but the user could generate X more amount of points that would increase this ratio. So if the user point cap is 1000 and they triggered this at 1010 points, they could go on and end the session with 2000 points. The ratio will be show the current value when they visit that over the cap view and would display the correct 2.0 ratio.
2. An email can be generated and sent out to the user breaking the anomalous point cap. This email is fully customizable by the bank and it is recommended that the wording be reviewed prior to enabling this feature for all users. Example of Customer Email: If employees and customers are set to receive over cap emails, the system will send them when the user performs an activity that sends them over the cap.
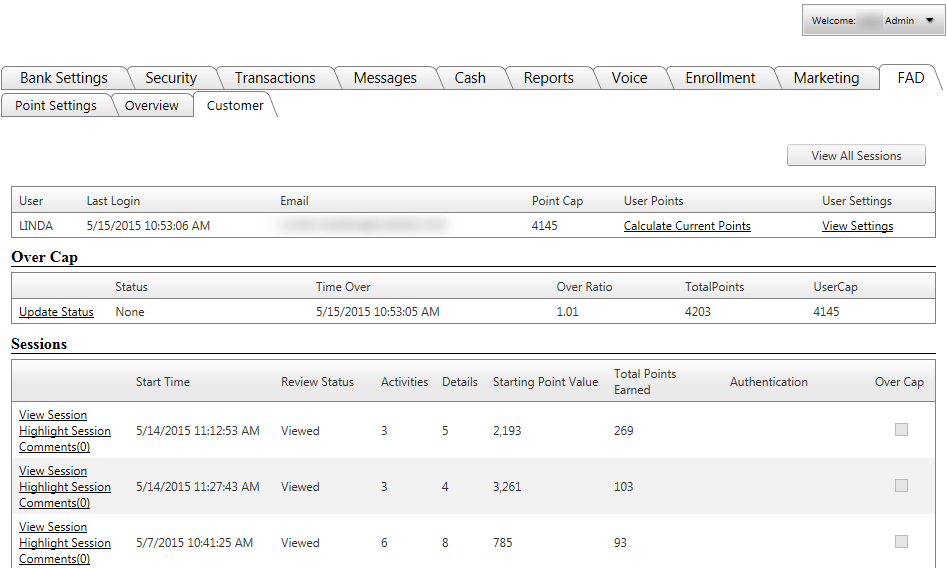
3. The user will appear on the Overview tab under the section listed as "Over the Limit," designating that they broke the bank point cap based upon the business rules set in place for them. 4. A real time authentication (challenge) can require the user to prove they are who they say they are. This is a per user based permission with a bank wide setting to turn off any stop points or to look to the customer's value. The user real time authentication method is determined by the bank from the following options below:
If users are prompted for authentication using a security question, one of their three security questions will be displayed here.
Session section:
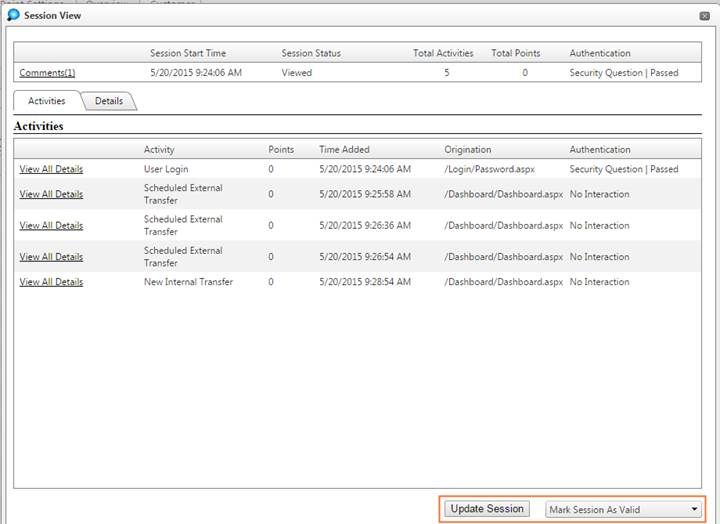
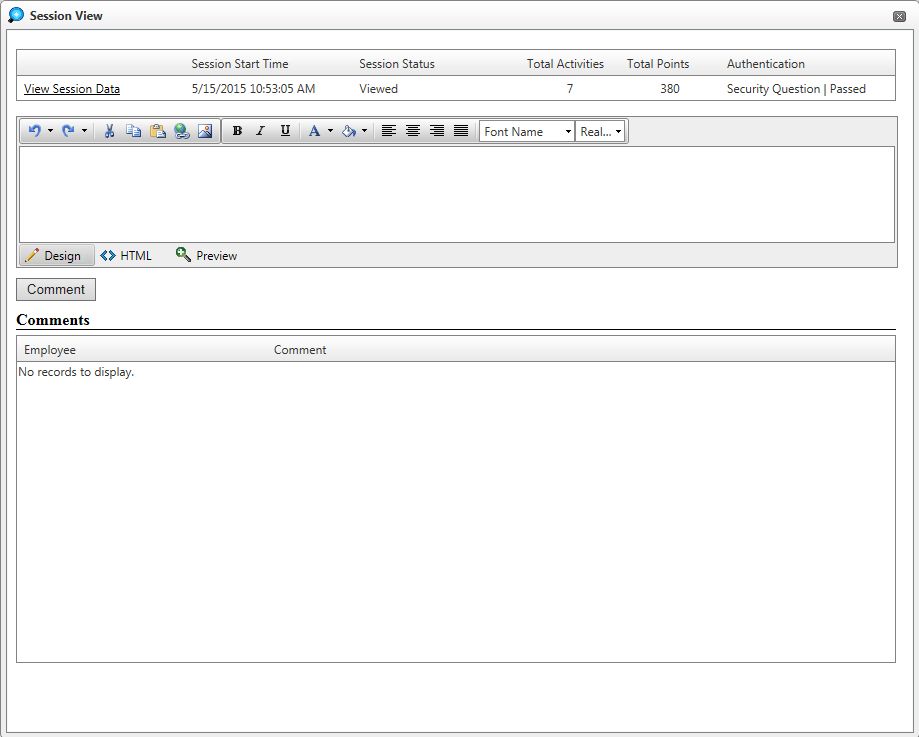
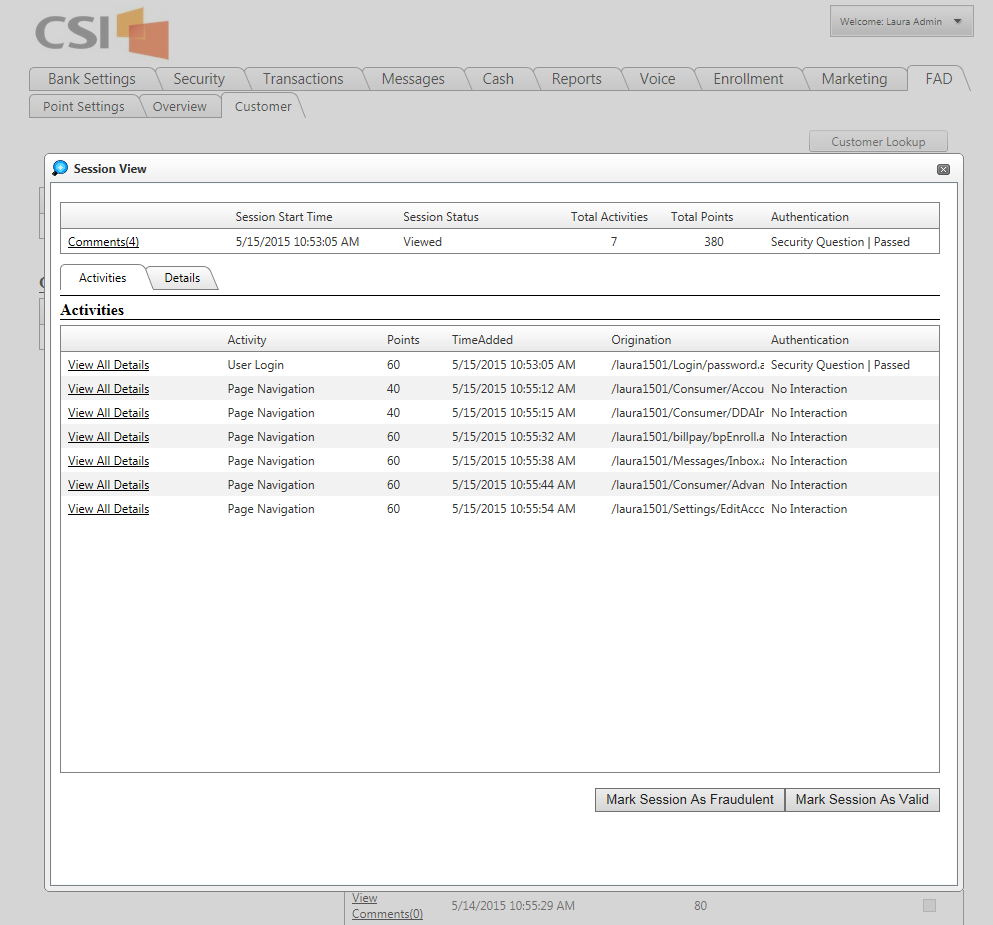
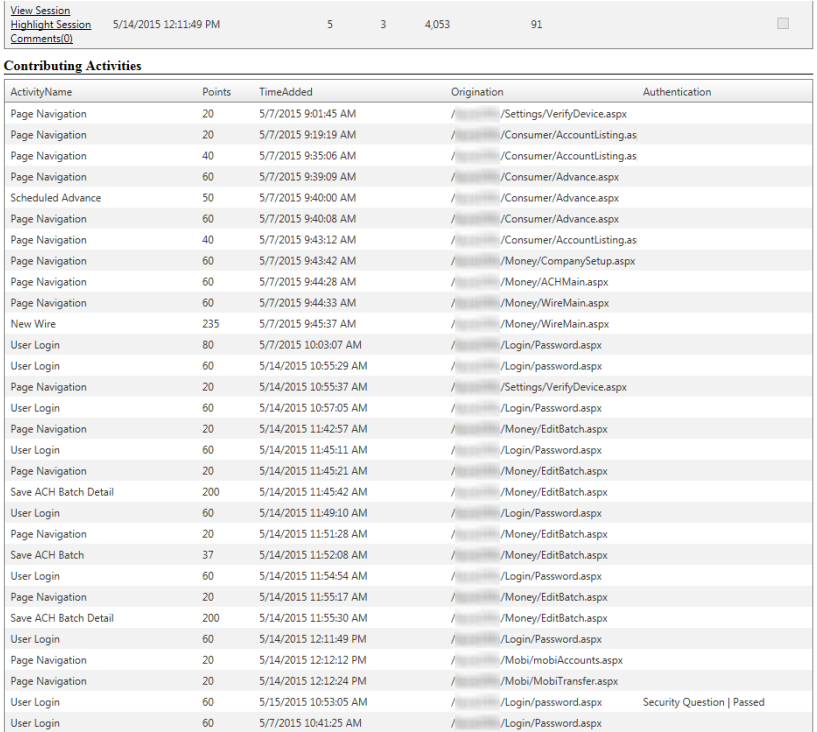
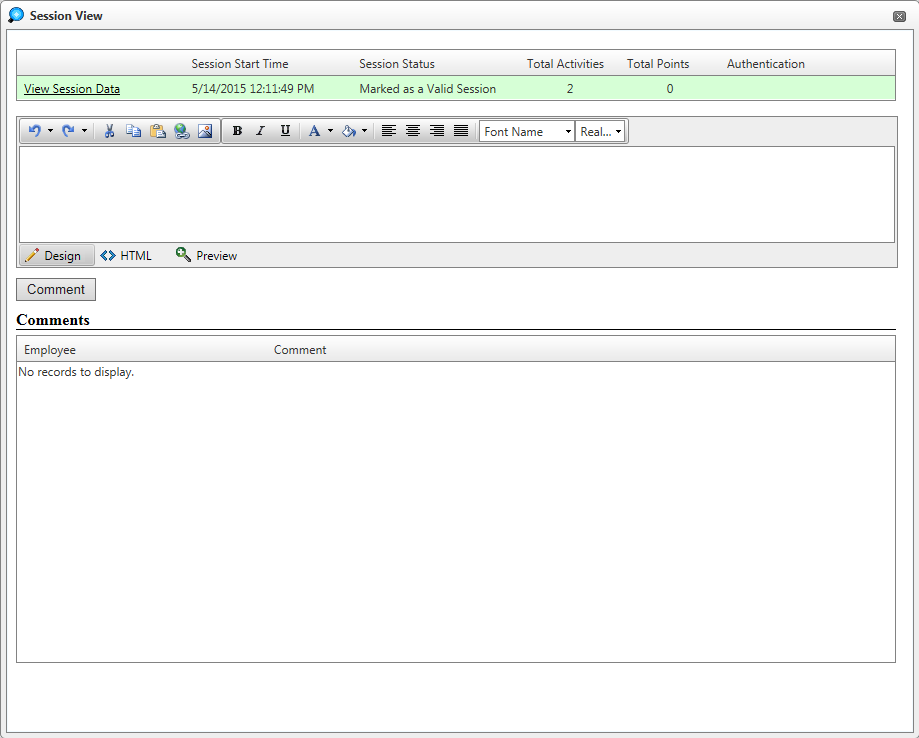
When the View Session button is clicked, the user is directed to the Session View window that displays information about the session including activities and details. Opening this window causes the Session Status value to change to Viewed.
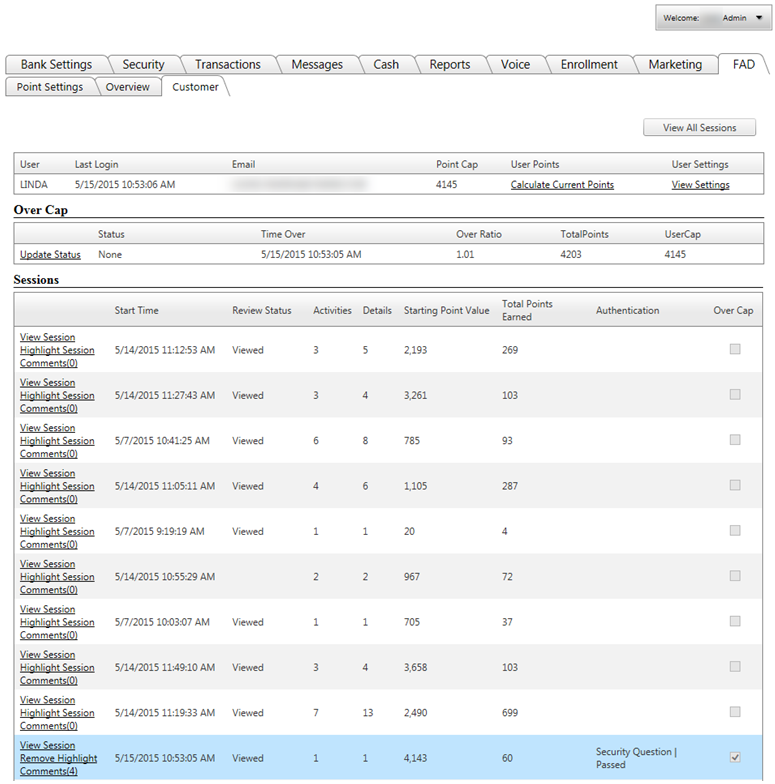
Note about buttons and drop-down: When not marked fraud or valid then we display Mark Session as Fraudulent and Mark Session as Valid. When marked as fraud or valid, then we only display the Reset option. Clicking Reset prompts a confirmation. When the Highlight Session link is clicked, the session will be highlighted in light blue along with the contributing activities and details for the session. This makes it easier for users to see which contributing activities and details make up a session. Once a session is highlighted, the link is renamed Remove Highlight. Users can click the Remove Highlight link to remove the highlight or the highlighting will be removed when highlighting is added to another session.
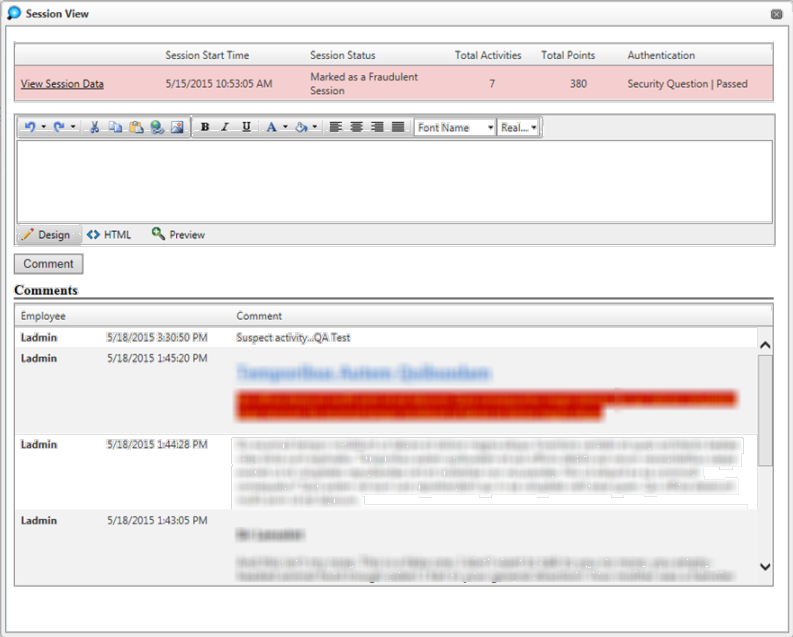
When the Comments link is clicked, the Session View window is displayed but this time instead of session data being displayed, users are able to add and view comments for the session.
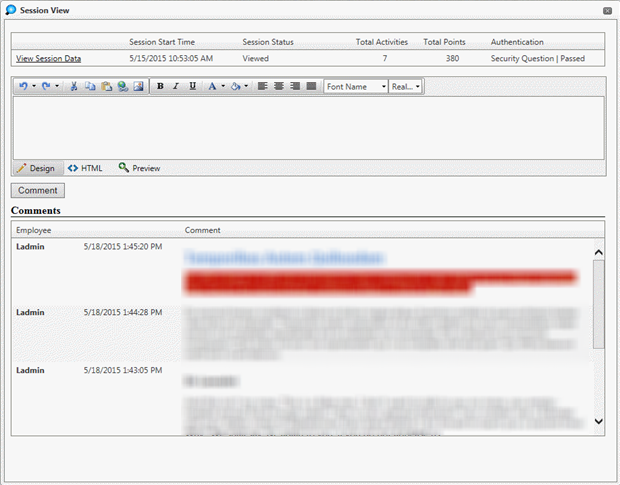
Users can add comments by entering the desired data and pressing the Comment button. The comments are then displayed in the Comments grid in order by date and time with the most recent at the top. Once comments are added the Comments link includes a number next to it that indicates the number of comments for the session.
Once comments are added the Comments link includes a number next to it that indicates the number of comments for the session.
While viewing or adding comments, users can click the View Session Data link to view the Activities and Details of the session. When viewing the Activities and Details, the user can click the Comments link to view/add comments.
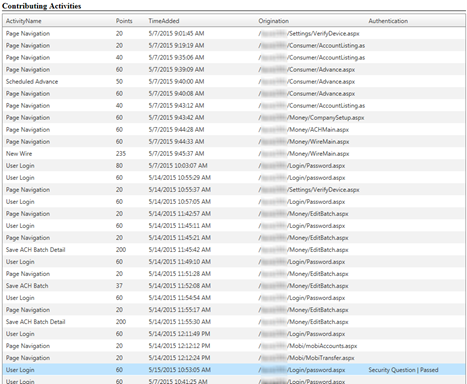
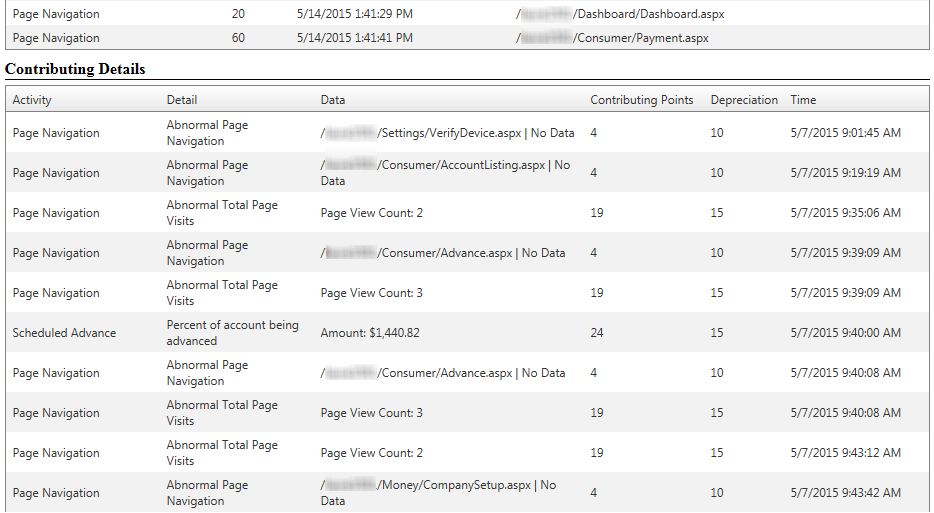
Contributing Activities section:
Contributing Details grid:
All of the columns in the Sessions, Contributing Activities, and Contributing Details grids can be sorted in ascending and descending order.
Three other buttons exist on the Over Cap page:
The View All Sessions button, when clicked, directs users to the Customer Activities page. This page is very similar to the Over Cap page but is not as detailed.
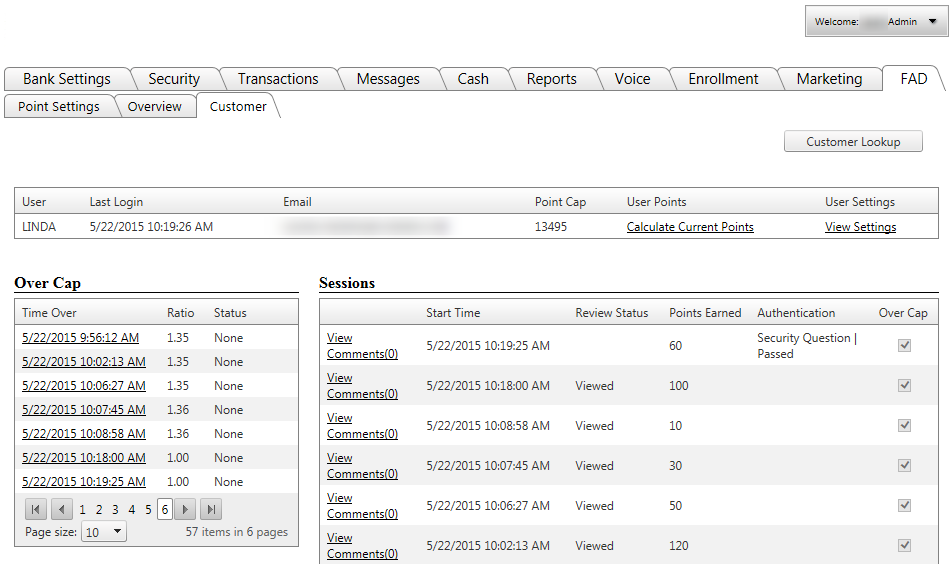
Clicking the Calculate Current Points button will display the current number of points for the user. A Refresh button will also be displayed that they user can click at any time to refresh this total.
Clicking the View Settings button will direct the employee to the Point Settings page for the user. The point settings displayed will be user specific, the user being viewed will be displayed at the top of the page.
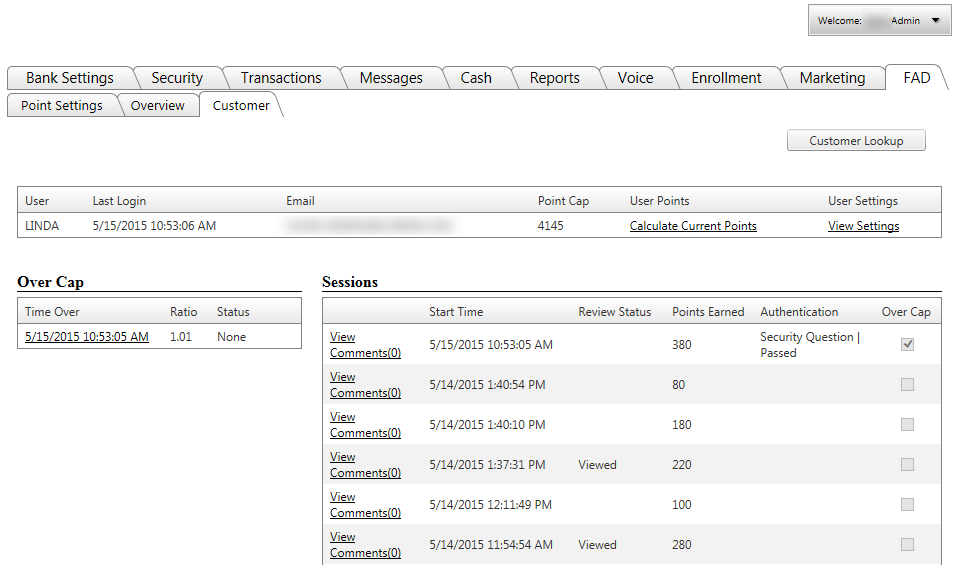
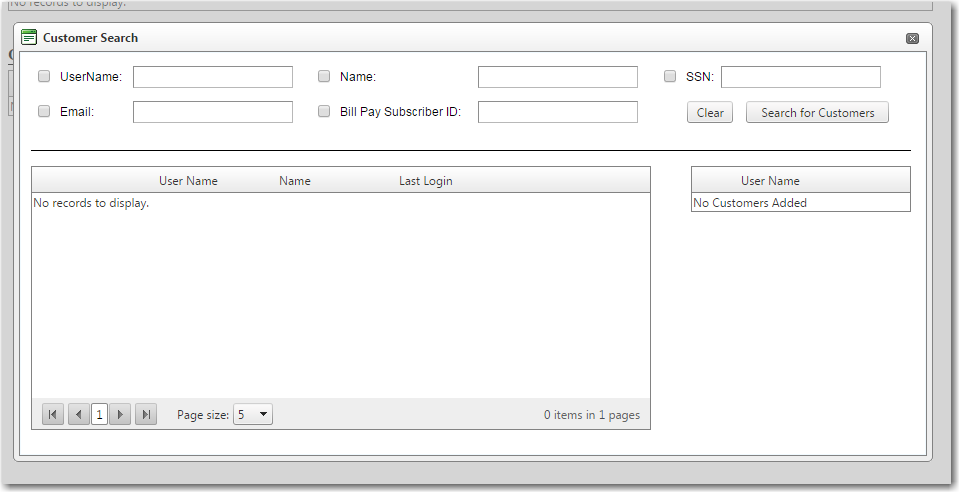
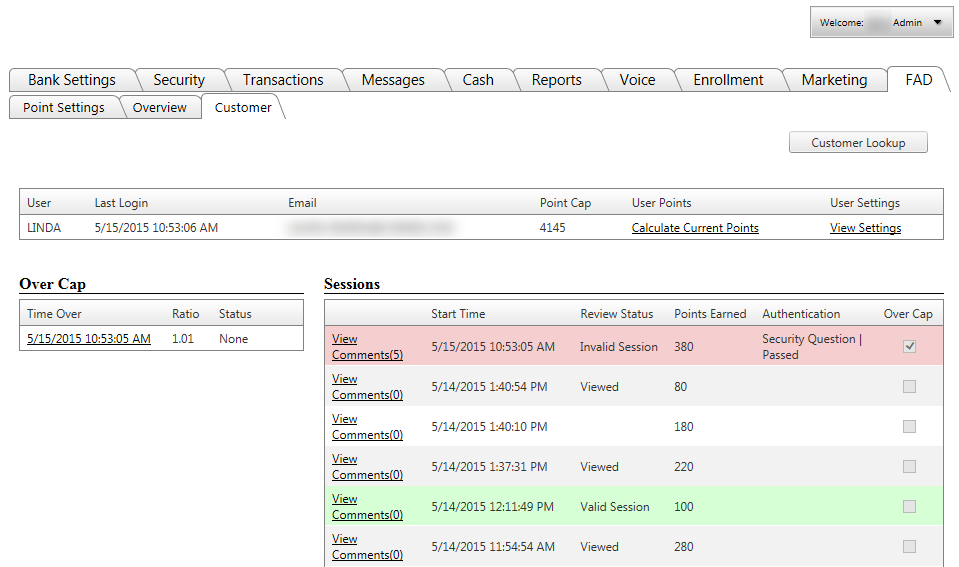
Customer Activities page This is the page seen when choosing to View Activities for a customer (FAD >> Customer). Going to this page without a customer currently being viewed will display a popup with search capabilities for quick user selection.
Many of the buttons and information here are the same as those on the Over Cap page. The first section contains customer information including the username, last login date and time, email address, user point cap, current points, and the ability to view user settings. The Over Cap section displays a link to each session that has gone over a user’s cap. Clicking the date/time link for any of these sessions will direct the user to the Over Cap page that we have already covered. The section also contains the ratio (ration of point cap and total points) and the status (None, Under Review, Reviewed). The Sessions section displays the session start time, the Review Status, points earned in the session, authentication method and result, and whether the session went over the cap. The review status will be blank if it has not yet been viewed, Viewed if it was viewed but not marked as valid or invalid, Valid Session, or Invalid Session.
Users can click the View button to view activities and details for the session or the Comment button to view comments for the session. Either button directs them to the Session View window. In the same way the buttons did on the Over Cap page.
Users can mark a session as Fraudulent or Valid by clicking the corresponding button at the bottom of the Session View window. Clicking either button will direct the user to enter a comment before confirming the action. Users do not have to enter a comment but they must press the Mark Session As Fraudulent button or Mark Session as Valid button again here in order to confirm the action. They can cancel the action by pressing the cancel button. Once they mark the session, the session information section color is changed to green (if valid) or red (if fraudulent/invalid) and the session status is updated as well.
The status values are carried over to the Customer Activities page.
54081
| ||||


| Top of Page |
Customer Portal
Send Feedback
Print |
||
|
|||