Customers tab
Customers require credentials to access the Digital Banking site. The initiation process consists of the bank creating a profile with the customer’s name, username and email address. The email invitation sent allows the completion of the login/setup process, where the customer enters his/her password.
The profile per customer also contains:
- Values used for recent transactions, defaulted but editable (up to the maximum allowed)
- Bill payer enabled status
- Cash management enabled status
- The last time the customer accessed the digital-banking site
Search Types:
There are different search capabilities available to locate an customer for review or edit.
Note: No customer will display until you click the Search for Customers button. No criteria need to be selected.
- UserName: enter the user name or part of user name
- Account: enter the account number and select Search for Customers
- Name: enter the name or part of name. This field is not case sensitive and is a string search. For example: If "rob" is entered, any customer that has rob in the name is selected, such as ROB; Robert or Frank Robbins.
- Email: enter the email address or part of the email address
- TIN: enter the social security number/TIN and select Search for Customers
- Bill Pay Subscriber ID: enter the Bill Pay Subscriber ID number.
Understanding Search Results
- Invite Status Filter:
- Green Checkmark: The customer has completed the setup process.
- Envelope: The customer has been invited but has not completed the setup process.
- User Status Filter:
- Lock: Locked by the customer.
- Lock with Red: Disabled (A Disabled Status is added manually by a Digital Banking administrator).
- Lock with Green: Disabled Inactive (Disabled Inactive is a record that has become disabled because of inactivity).
- Show Self Enrolled Customers:Displays customers who have completed digital banking self-enrollment. This is only available for banks that have self-enrollment enabled.
- Show Deleted Customers: Check this box to display customer records that have been deleted.
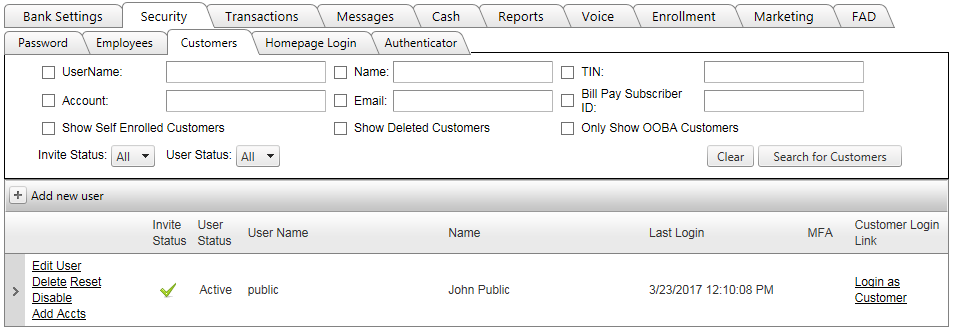
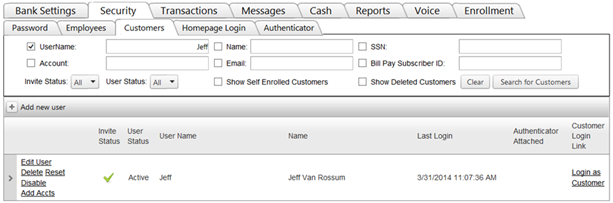
The User Grid
This grid allows you to edit, delete, reset, or disable a user record. You can also add accounts to the user's record.
Columns:
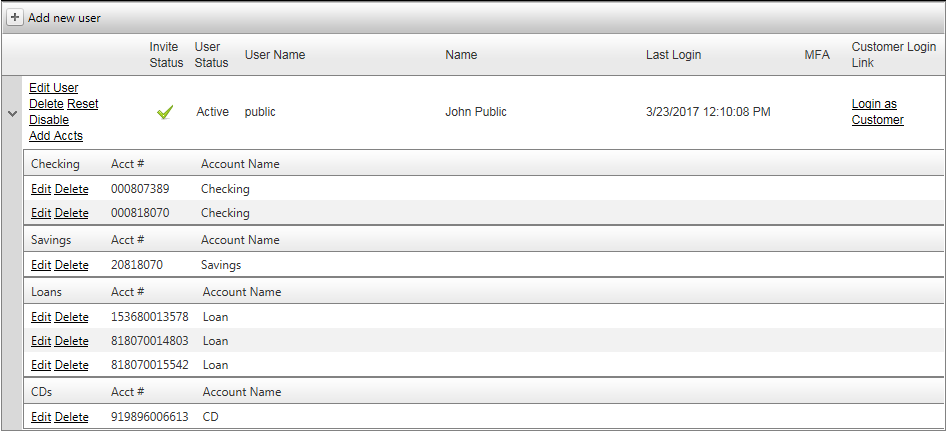
- Clicking the arrow on the left will expand this customer's profile to show all accounts within the Digital Banking site.
- Invite Status
- User Status
- User Name
- Name
- Last Login
- MFA: An icon displays if an authenticator is attached for this login. Authenticators must be enabled for your institution in order to view the Authenticator Attached field.
- Customer Login Link: Click on the Login as Customer link to choose which site to view as the customer, with view-only access.
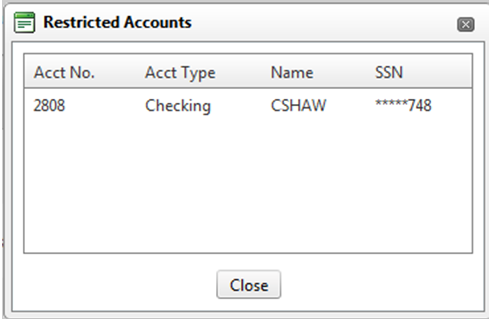
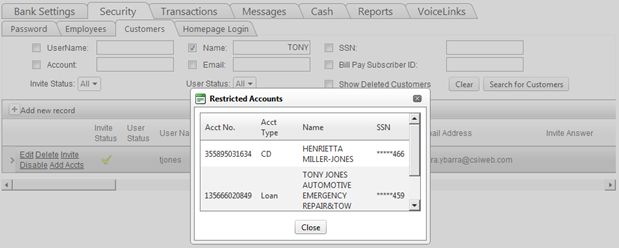
If the link displays the word "Restricted," an account associated with this customer has been added to the list on the Security >> Restricted Accounts tab. The Digital Banking Administrator will need to have "Can Login as Restricted Customer" permission granted on the Security >> Employees tab in order to Login as Customer. If permission is not granted, the Administrator will get this message box displaying the restricted account(s):
- To delete a user record, select Delete.
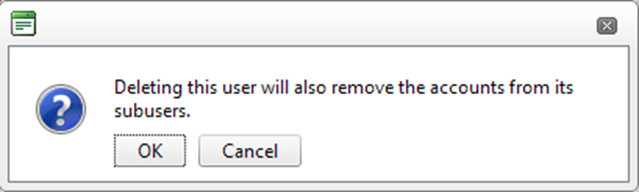
If you are deleting a master user with sub-users, a warning box will appear stating that accounts under the sub-user will be removed. The sub-user is not removed but all accounts under that user are removed.
- To reset a user record for a customer who cannot remember login information, click Reset.
Note: Until the customer has completed the setup process and the User Status is Active, there will be an Invite link instead of a Reset link.
After selecting Reset, a message box will ask for a Security Code:
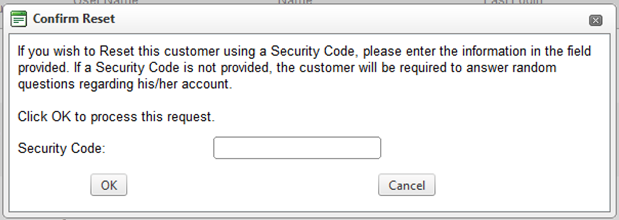
Customers will receive an email with a link and will be prompted to match the information entered in the Security Code field.

Note: If you are resetting a customer that has been deleted, be sure to assign accounts to the customer prior to selecting Reset.
- To edit a customer's details, click Edit User.
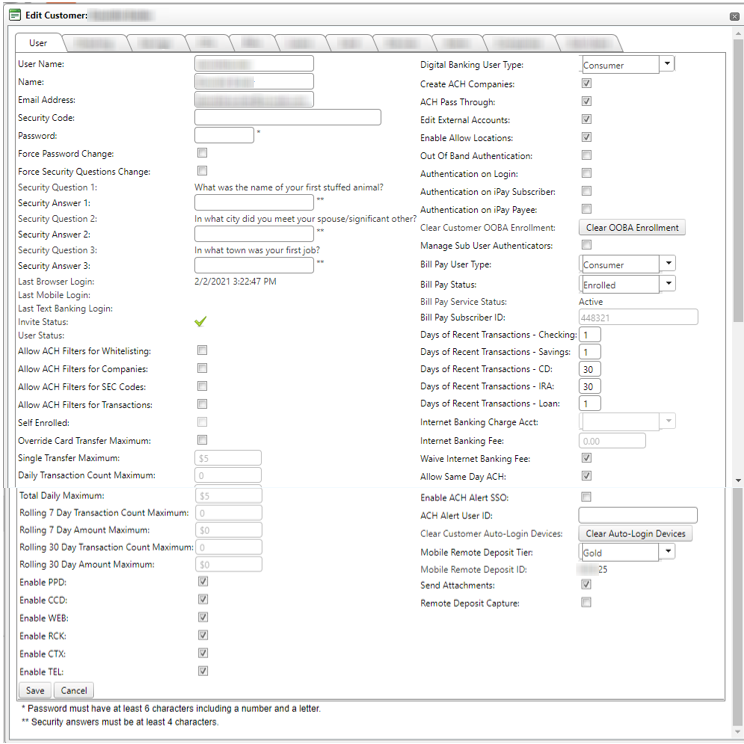
In order to view and/or edit account permissions and information, you can click on the corresponding account tab. At that time all accounts of that type will be displayed along with all applicable permissions. If only one account of that type exists, that account and its permissions will be displayed in the account grid.
If more than one account of that type exists, all accounts and their permissions will be displayed in the account grid. You can then edit as few or as many account permissions for as few or as many accounts as they wish.
Adding a New Customer
- To add a new customer record, select Add New User. Enter the information for the customer:
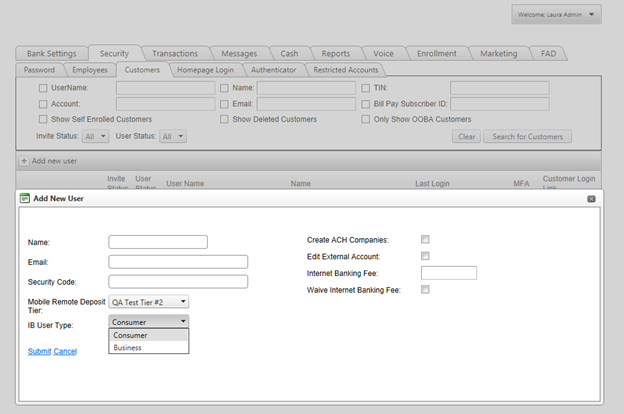
- Name: The customer’s name
- Email Address: the email address
- Invite Answer: A specific answer provided by the bank for the customer to use to complete the setup process. As a security measure, the setup process presents a challenge question that the customer must answer to correctly in order to continue.
- Create ACH Companies: if bank offers ACH services, this allows a customer the ability to create ACH batches
- Mobile Remote Deposit Tier: If a default has been set on the Bank Settings >> Account Defaults tab, it will be displayed first.
- IB User Type: This allows the bank to differentiate which type of user they are, and ultimately what type of UI experience they should get as we move forward and make changes to our UI. This would also control which mobile app experience that user would have.
By default, all cash management users will be set as "Business." Users who do not have access to cash management (ACH, Wires, Positive Pay), will be set as "Consumer." Banks will be able to edit this field as needed for existing and new customers.
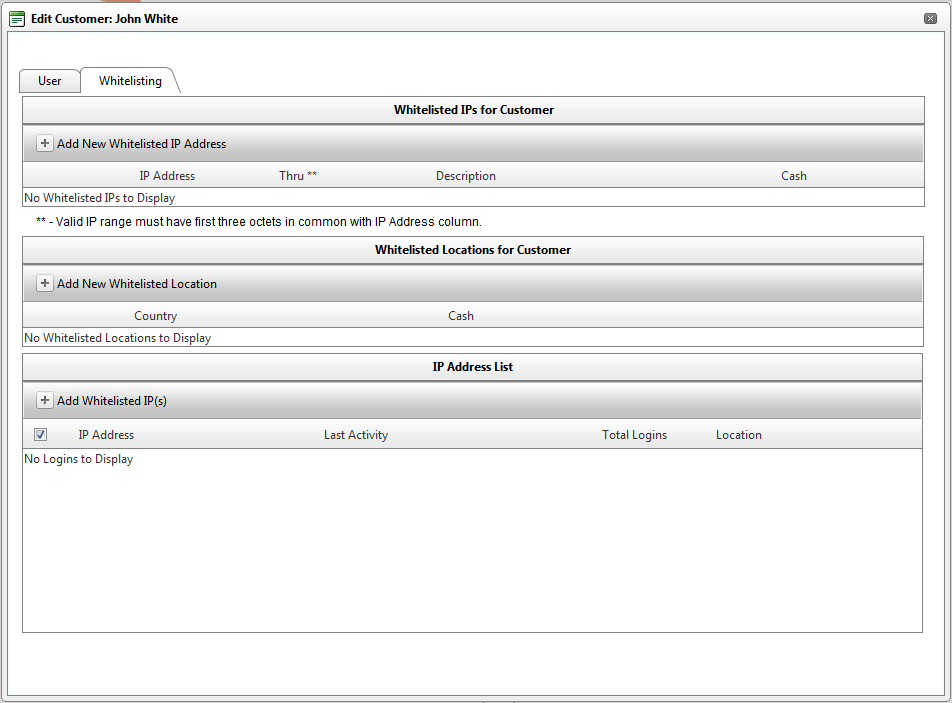
- Enable Whitelisting: If IP Whitelisting is used at your bank, and you have been granted permission to set whitelisting, the Enable Whitelisting option is available. If this box is checked, then the Whitelisting tab becomes available on the Edit Customer tab after the new customer is saved. The Whitelisting tab allows you to set up whitelisted locations.
- Edit External Accounts: allows the ability to add/edit external accounts
- Customer Login Link: If you have access to view Restricted information, click the Restricted link. The following will appear:
- Internet Banking Fee: Not in use.
- Waive Internet Banking Fee: Not in use.
When the customer setup is complete, select Submit.
Note: Before sending an invitation to the customer for setup completion, at least one account MUST be loaded. This is advantageous especially for new customers with Digital Banking. All new accounts will automatically associate to the social security number when the extract process completes if auto-relate is turned on for the bank. Any pre-existing accounts for new customers require loading.
19441
|
 Customer Portal